
Kali & LLM: Completely local with Ollama & 5ire
Table of Contents
We are extending our LLM-driven Kali series, where natural language replaces manual command input. This time however, we are doing everything locally and offline. We are using our own hardware and not relying on any 3rd party services/SaaS.
Note: Local LLMs are hardware-hungry. The cost factor here is buying hardware and the running costs. If you have anything that you can re-use, great!
GPU (Nvidia)
Let’s first find out what our hardware is:
$ lspci | grep -i vga
07:00.0 VGA compatible controller: NVIDIA Corporation GP106 [GeForce GTX 1060 6GB] (rev a1)
$
NVIDIA GeForce GTX 1060 (6 GB).
Drivers
We will check that our hardware is ready by making sure “non-free” proprietary drivers are installed. The non-free option allows for CUDA support which the open-source, nouveau, drivers lack.
At the same time, make sure our Kernel and headers are at the latest version too:
$ sudo apt update
[...]
$
$ sudo apt install -y linux-image-$(dpkg --print-architecture) linux-headers-$(dpkg --print-architecture) nvidia-driver nvidia-smi
[...]
│ Conflicting nouveau kernel module loaded                                                                  │
│ The free nouveau kernel module is currently loaded and conflicts with the non-free nvidia kernel module.  │
│ The easiest way to fix this is to reboot the machine once the installation has finished.                  |
[...]
$
$ sudo reboot
Using a different GPU manufacture, such as AMD or Intel etc, is out of scope for this guide.
Testing
Once the box is back up and we are logged in again, we can do a quick check with nvidia-smi:
$ lspci -s 07:00.0 -v | grep Kernel
  Kernel driver in use: nvidia
  Kernel modules: nvidia
$
$ lsmod | grep '^nouveau'
$
$ lsmod | grep '^nvidia'
nvidia_drm            126976  2
nvidia_modeset       1605632  3 nvidia_drm
nvidia              60710912  29 nvidia_drm,nvidia_modeset
$
$ nvidia-smi
Tue Jan 27 14:33:31 2026
+-----------------------------------------------------------------------------------------+
| NVIDIA-SMI 550.163.01             Driver Version: 550.163.01     CUDA Version: 12.4     |
|-----------------------------------------+------------------------+----------------------+
| GPU  Name                 Persistence-M | Bus-Id          Disp.A | Volatile Uncorr. ECC |
| Fan  Temp   Perf          Pwr:Usage/Cap |           Memory-Usage | GPU-Util  Compute M. |
|                                         |                        |               MIG M. |
|=========================================+========================+======================|
|   0  NVIDIA GeForce GTX 1060 6GB    Off |   00000000:07:00.0  On |                  N/A |
|  0%   30C    P8              6W /  120W |      25MiB /   6144MiB |      0%      Default |
|                                         |                        |                  N/A |
+-----------------------------------------+------------------------+----------------------+

+-----------------------------------------------------------------------------------------+
| Processes:                                                                              |
|  GPU   GI   CI        PID   Type   Process name                              GPU Memory |
|        ID   ID                                                               Usage      |
|=========================================================================================|
|    0   N/A  N/A       969      G   /usr/lib/xorg/Xorg                             21MiB |
+-----------------------------------------------------------------------------------------+
$
Everything looks to be in order.
Ollama
Next up, we need to install Ollama. Ollama will allow us to load our local LLM.
Ollama is a wrapper for llama.cpp. 5ire supports Ollama, but not llama.cpp.
If you do not want to-do curl|bash, see the manual method, or follow below for v0.15.2 (latest at the time of writing, 2026-01-27):
$ sudo apt install -y curl
[...]
$
$ curl --fail --location https://ollama.com/download/ollama-linux-amd64.tar.zst > /tmp/ollama-linux-amd64.tar.zst
[...]
$
$ file /tmp/ollama-linux-amd64.tar.zst
/tmp/ollama-linux-amd64.tar.zst: Zstandard compressed data (v0.8+), Dictionary ID: None
$ sha512sum /tmp/ollama-linux-amd64.tar.zst
1c16259de4898a694ac23e7d4a3038dc3aebbbb8247cf30a05f5c84f2bde573294e8e612f3a9d5042201ebfe148f5b7fe64acc50f5478d3453f62f85d44593a1  /tmp/ollama-linux-amd64.tar.zst
$
$ sudo tar x -v --zstd -C /usr -f /tmp/ollama-linux-amd64.tar.zst
[...]
$
$ sudo useradd -r -s /bin/false -U -m -d /usr/share/ollama ollama
$
$ sudo usermod -a -G ollama $(whoami)
$
$ cat <<EOF | sudo tee /etc/systemd/system/ollama.service >/dev/null
[Unit]
Description=Ollama Service
After=network-online.target

[Service]
ExecStart=/usr/bin/ollama serve
User=ollama
Group=ollama
Restart=always
RestartSec=3
Environment="PATH=\$PATH"

[Install]
WantedBy=multi-user.target
EOF
$
$ sudo systemctl daemon-reload
$
$ sudo systemctl enable --now ollama
Created symlink '/etc/systemd/system/multi-user.target.wants/ollama.service' → '/etc/systemd/system/ollama.service'.
$
$ systemctl status ollama
● ollama.service - Ollama Service
     Loaded: loaded (/etc/systemd/system/ollama.service; enabled; preset: disabled)
     Active: active (running) since Tue 2026-01-27 14:44:39 GMT; 18s ago
[...]
$
$ ollama -v
ollama version is 0.15.2
$
The service is reporting to be active and running (and nothing is off in the logs files).
LLM
Now we need an LLM for Ollama to run! There are a few places to find pre-generated LLMs:
- Ollama.com
- HuggingFace.co (aka HF)
Which models you might ask? Time to experiment!
- We need a model which has “Tools” support. We will explain later why this is important.
- Your hardware will dictate how complex of a model you can run. The hardware we are using has 6GB of VRAM , so we will need a model size which requires less.
We have chosen 3 to test:
$ ollama list
NAME           ID              SIZE      MODIFIED
llama3.1:8b    46e0c10c039e    4.9 GB    8 minutes ago
llama3.2:3b    a80c4f17acd5    2.0 GB    29 minutes ago
qwen3:4b       359d7dd4bcda    2.5 GB    39 minutes ago
$
Testing
Let’s test that Ollama is working.
$ ollama run qwen3:4b
The first time we do this, it needs to load the model into memory. This may take a while depending on your hardware.
When the LLM has been loaded, we will get a prompt. Let’s just say “Hello world!”:
>>> Hello world!
Thinking...
Okay, the user said "Hello world!" and wants me to respond. Let me think about how to approach this. First, I should acknowledge their greeting. Since they used the classic "Hello World!" which is often
the first program in many programming languages, maybe I can relate that to my capabilities. I should make sure to keep the tone friendly and open for further conversation. Let me check if there's
anything specific they might need help with. Maybe they're just testing me or want to start a discussion. I'll keep the response simple and welcoming, inviting them to ask questions or share what they
need help with. Also, I should avoid any markdown and keep it natural. Alright, time to put that together.
...done thinking.

Hello! 😊 How can I assist you today? Whether you have questions, need help with something, or just want to chat, I'm here for you! What's on your mind?

>>> /exit
$
We can check Ollama status by doing:
$ ollama ps
NAME        ID              SIZE      PROCESSOR    CONTEXT    UNTIL
qwen3:4b    359d7dd4bcda    3.5 GB    100% GPU     4096       4 minutes from now
$
Great, it appears that everything is working well here.
MCP Server (MCP Kali Server)
We will now need to install and run a MCP server.
For this guide, we did a fresh minimal installation of Kali, which means there isn’t any pre-installed tools.
Sticking once again to mcp-kali-server:
$ sudo apt install -y mcp-kali-server dirb gobuster nikto nmap enum4linux-ng hydra john metasploit-framework sqlmap wpscan wordlists
[...]
$
$ sudo gunzip -v /usr/share/wordlists/rockyou.txt.gz
/usr/share/wordlists/rockyou.txt.gz:   61.9% -- replaced with /usr/share/wordlists/rockyou.txt
$
$ kali-server-mcp
2026-01-27 15:54:01,339 [INFO] Starting Kali Linux Tools API Server on 127.0.0.1:5000
 * Serving Flask app 'kali_server'
 * Debug mode: off
2026-01-27 15:54:01,352 [INFO] WARNING: This is a development server. Do not use it in a production deployment. Use a production WSGI server instead.
 * Running on http://127.0.0.1:5000
2026-01-27 15:54:01,352 [INFO] Press CTRL+C to quit
Long term, there are various different ways to have kali-server-mcp running in the background, such as using a tmux/screen session, or creating a systemd.unit, but that’s out of scope for this.
Testing
Let’s manually run mcp-server now:
$ mcp-server
2026-01-27 15:54:18,802 [INFO] Initialized Kali Tools Client connecting to http://localhost:5000
2026-01-27 15:54:18,811 [INFO] Successfully connected to Kali API server at http://localhost:5000
2026-01-27 15:54:18,811 [INFO] Server health status: healthy
2026-01-27 15:54:18,826 [INFO] Starting Kali MCP server


2026-01-27 15:54:18,804 [INFO] Executing command: which nmap
2026-01-27 15:54:18,806 [INFO] Executing command: which gobuster
2026-01-27 15:54:18,807 [INFO] Executing command: which dirb
2026-01-27 15:54:18,808 [INFO] Executing command: which nikto
2026-01-27 15:54:18,810 [INFO] 127.0.0.1 - - [27/Jan/2026 15:54:18] "GET /health HTTP/1.1" 200 -
Everything is looking good! No errors or warnings.
We can also see that kali-server-mcp has additional lines in its log. Good.
5ire
So we have a local LLM working, and a MCP. Ollama doesn’t support MCP (yet?), so we need to use something that can take bridge the gap. Enter 5ire - “A Sleek AI Assistant & MCP Client”.
Next, Download 5ire’s AppImage (5ire-0.15.3-x86_64.AppImage at the time of writing, 2026-01-27) and make a menu entry:
$ curl --fail --location https://github.com/nanbingxyz/5ire/releases/download/v0.15.3/5ire-0.15.3-x86_64.AppImage > 5ire-x86_64.AppImage
[...]
$
$ file 5ire-x86_64.AppImage
5ire-x86_64.AppImage: ELF 64-bit LSB executable, x86-64, version 1 (SYSV), dynamically linked, interpreter /lib64/ld-linux-x86-64.so.2, for GNU/Linux 2.6.18, stripped
$ sha512sum 5ire-x86_64.AppImage
bdf665fc6636da240153d44629723cb311bba4068db21c607f05cc6e1e58bb2e45aa72363a979a2aa165cb08a12db7babb715ac58da448fc9cf0258b22a56707  5ire-x86_64.AppImage
$
$ sudo mkdir -pv /opt/5ire/
mkdir: created directory '/opt/5ire/'
$
$ sudo mv -v 5ire-x86_64.AppImage /opt/5ire/5ire-x86_64.AppImage
renamed '5ire-x86_64.AppImage' -> '/opt/5ire/5ire-x86_64.AppImage'
$
$ chmod -v 0755 /opt/5ire/5ire-x86_64.AppImage
mode of '/opt/5ire/5ire-x86_64.AppImage' changed from 0664 (rw-rw-r--) to 0755 (rwxr-xr-x)
$
$ mkdir -pv ~/.local/share/applications/
mkdir: created directory '/home/kali/.local/share/applications/'
$
$ cat <<EOF | sudo tee ~/.local/share/applications/5ire.desktop >/dev/null
[Desktop Entry]
Name=5ire
Comment=5ire Desktop AI Assistant
Exec=/opt/5ire/5ire-x86_64.AppImage
Terminal=false
Type=Application
Categories=Utility;Development;
StartupWMClass=5ire
EOF
$
$ sudo ln -sfv /opt/5ire/5ire-x86_64.AppImage /usr/local/bin/5ire
'/usr/local/bin/5ire' -> '/opt/5ire/5ire-x86_64.AppImage'
$
$ sudo apt install -y libfuse2t64
[...]
$
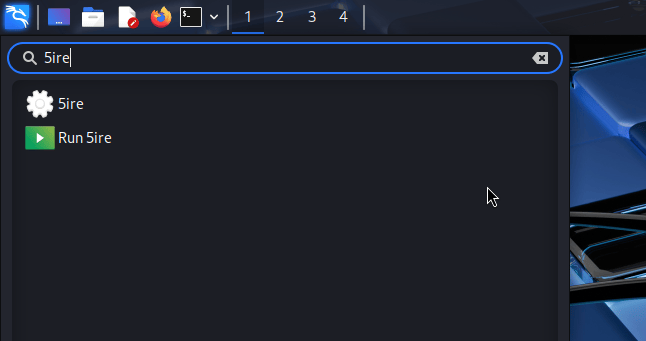
We can now either use the menu, or call it from a terminal.
Now we need to configure 5ire to use Ollama (for LLM) and mcp-kali-server (MCP server):
Let’s now setup 5ire to use Ollama.
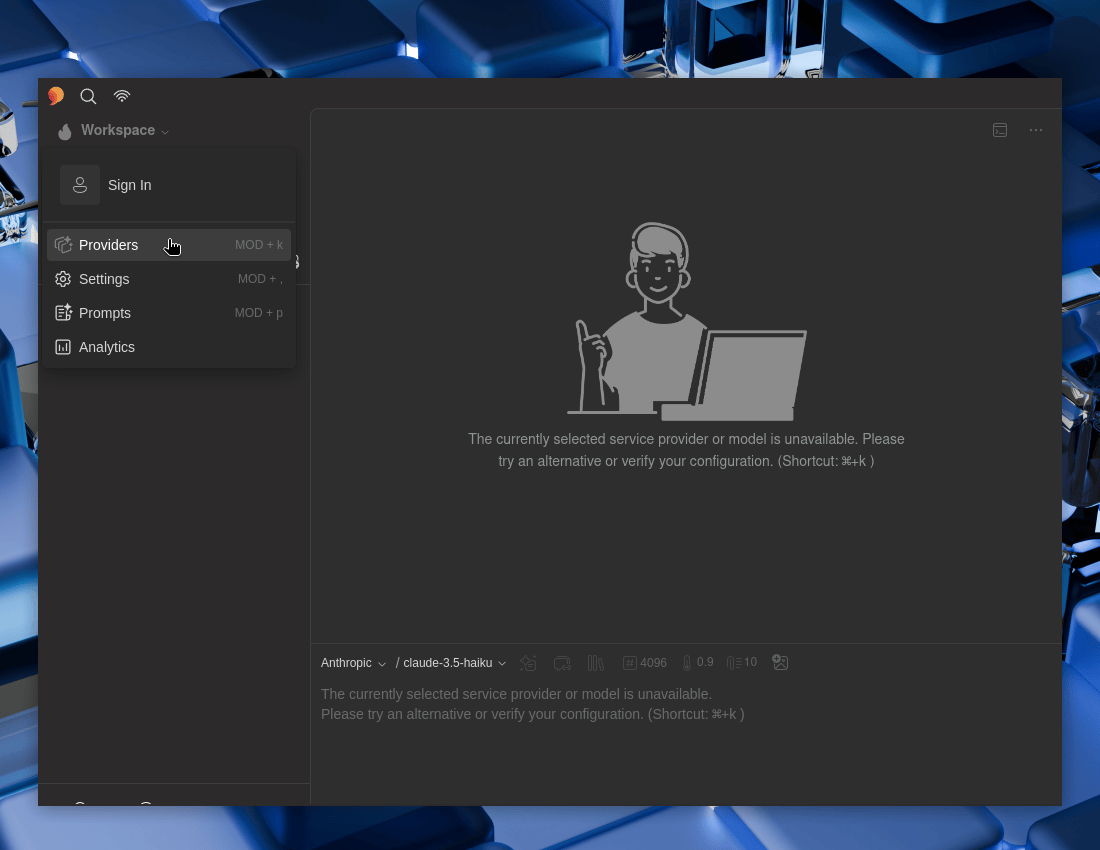
Open 5ire, then:
- 5ire -> Workspace -> Providers -> Ollama
Let’s toggle Default to Enable it
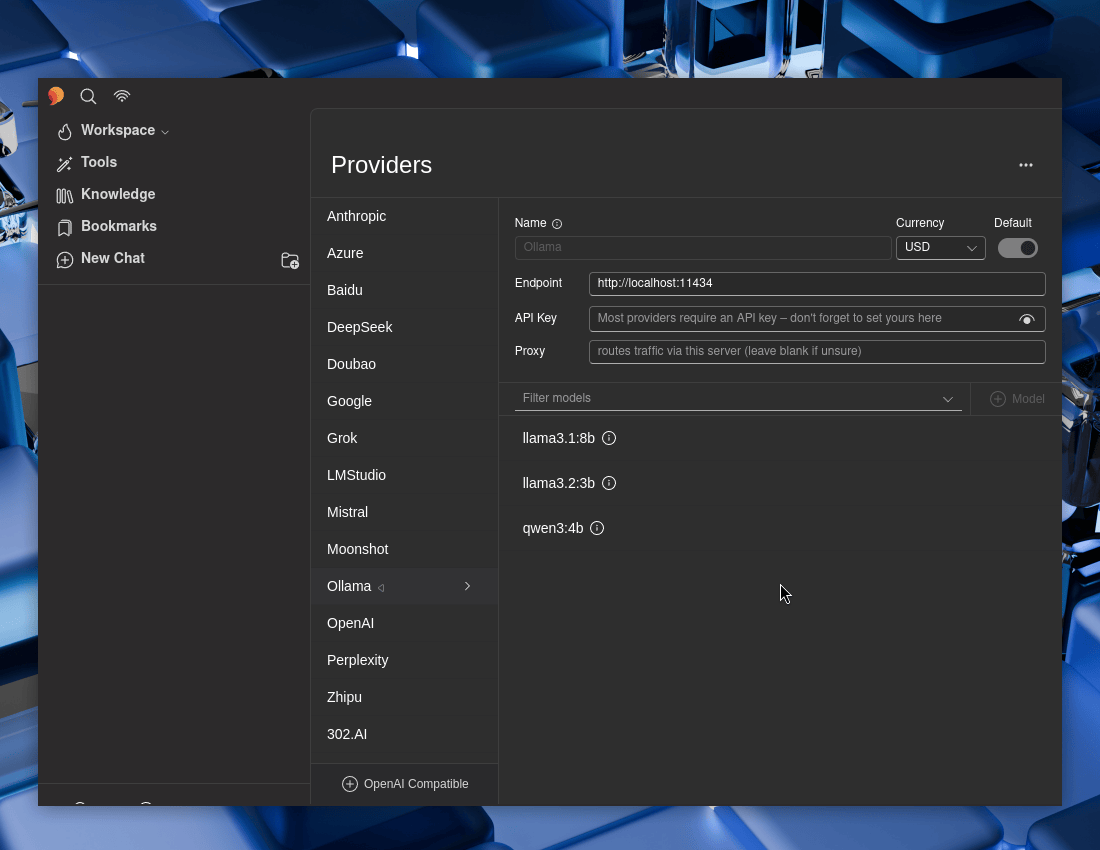
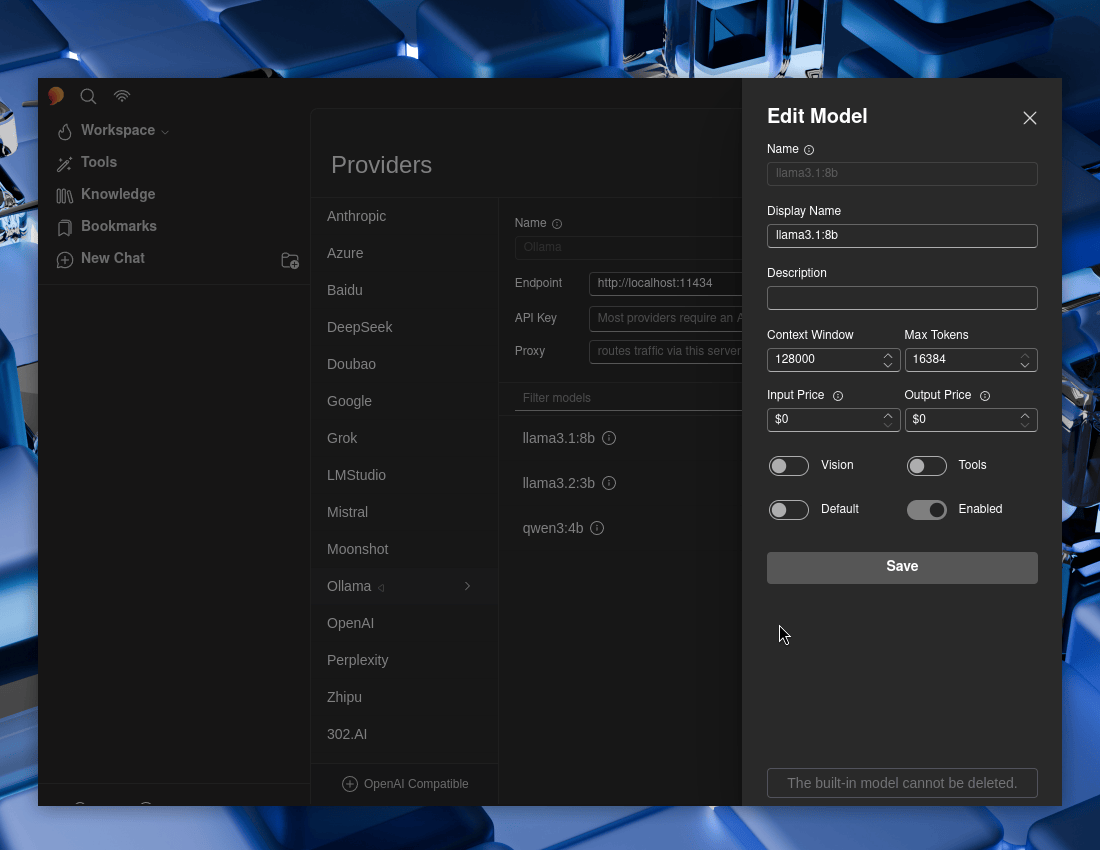
Select each of the Ollama models, and then make sure “Tools” and “Enabled” are both toggled to enable -> Save. Repeat for each of them.
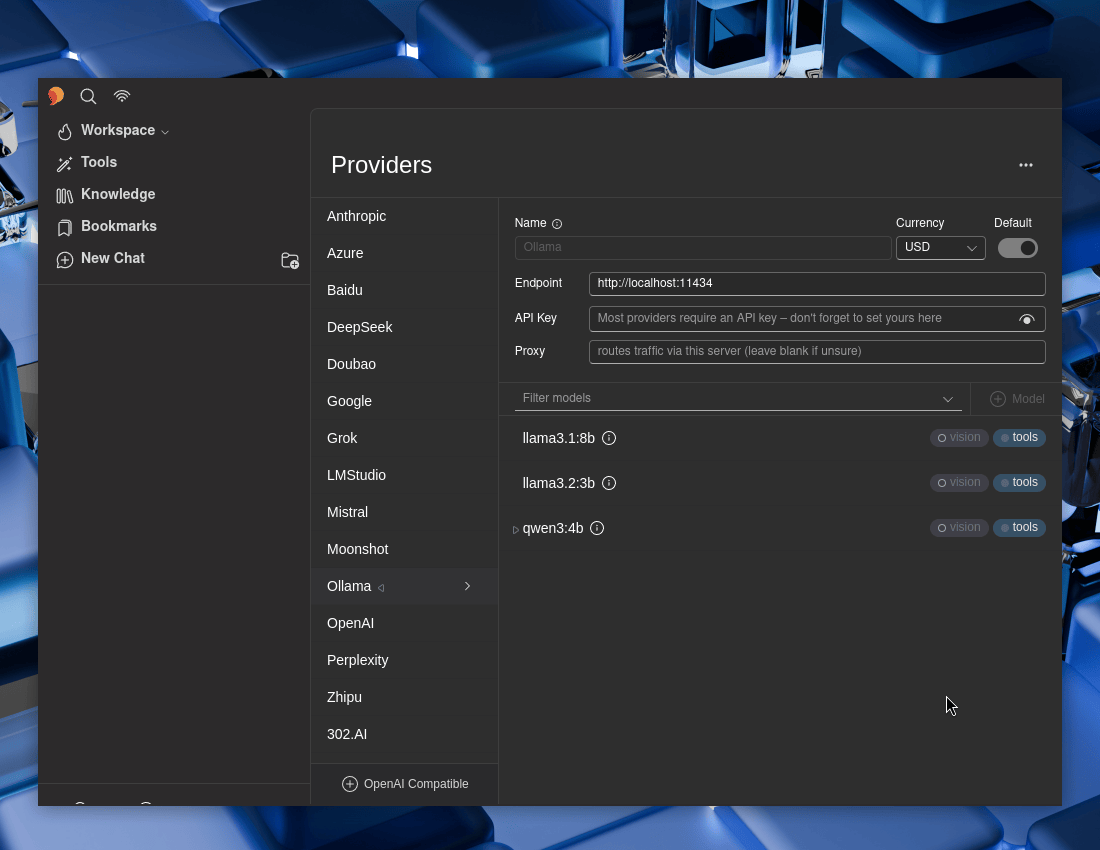
If you wish, select a model to be the default one.
Testing
Now let’s test 5ire out!
- New Chat -> Ollama
Hello world!

Again, checking status:
$ ollama ps
NAME        ID              SIZE      PROCESSOR    CONTEXT    UNTIL
qwen3:4b    359d7dd4bcda    3.5 GB    100% GPU     4096       2 minutes from now
$
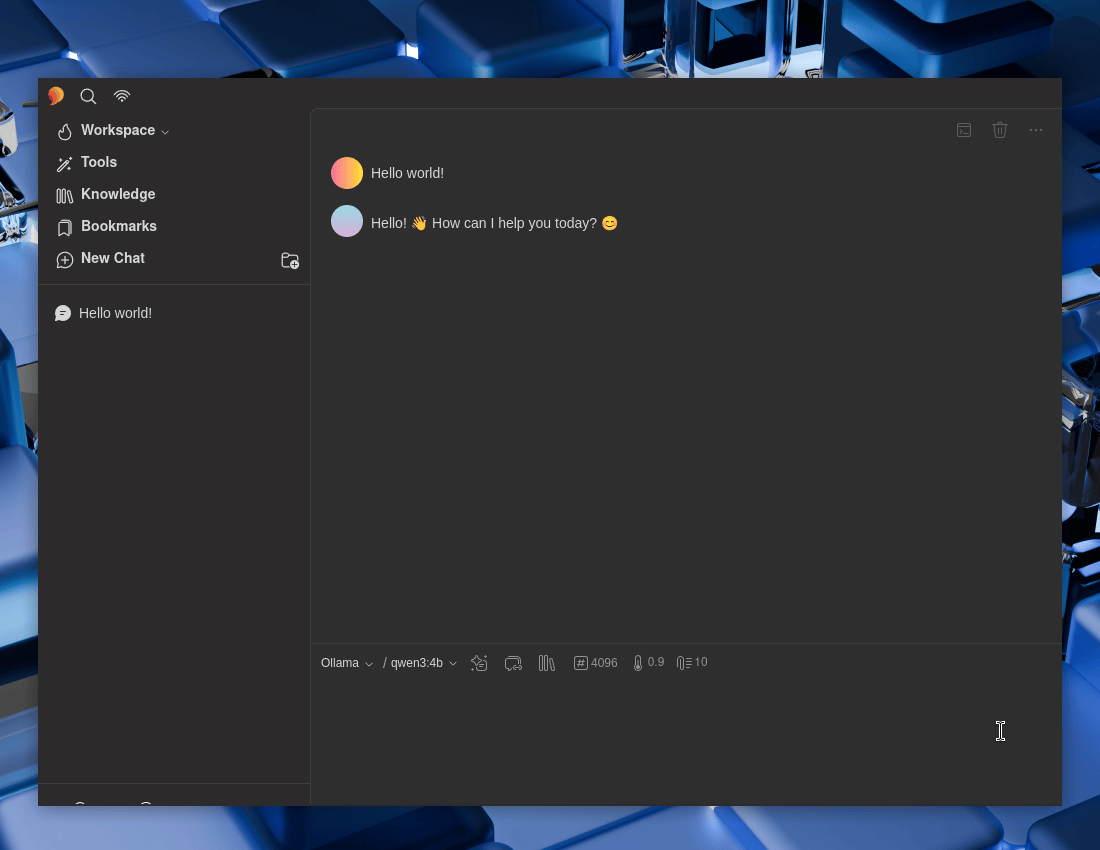
Looks to be working well! Time to setup the MCP.
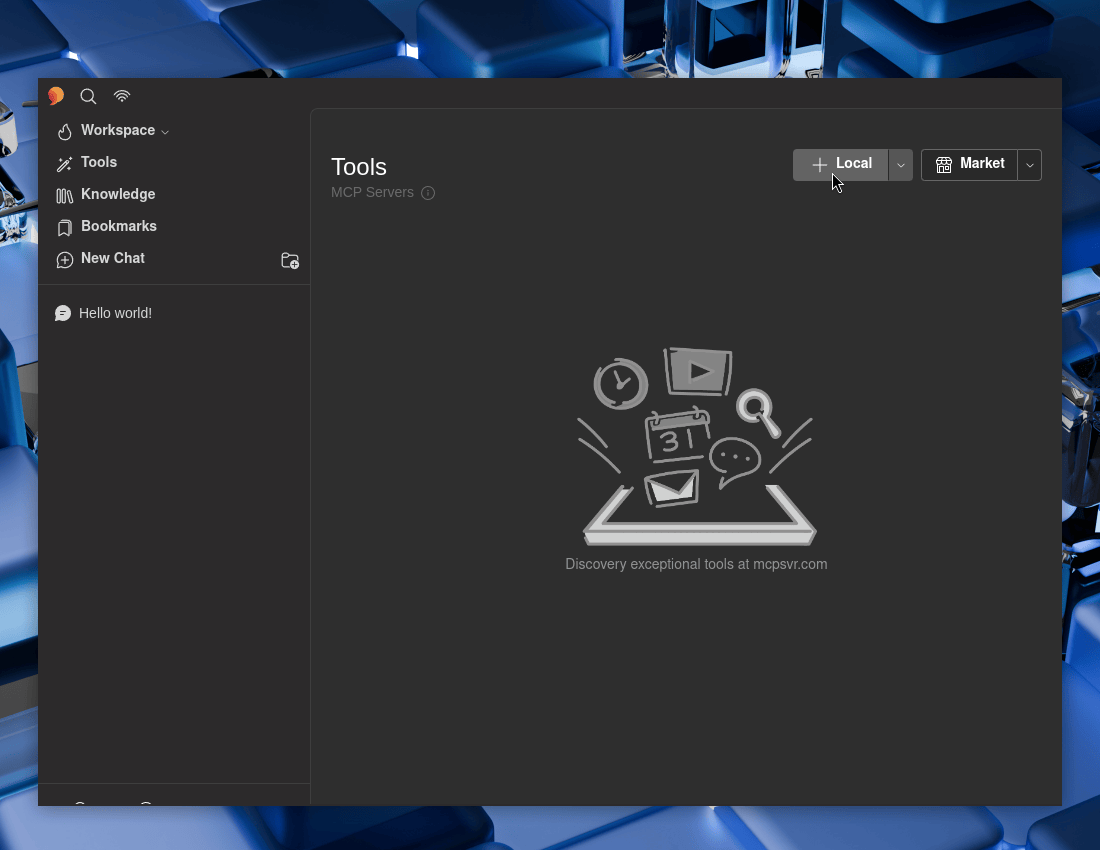
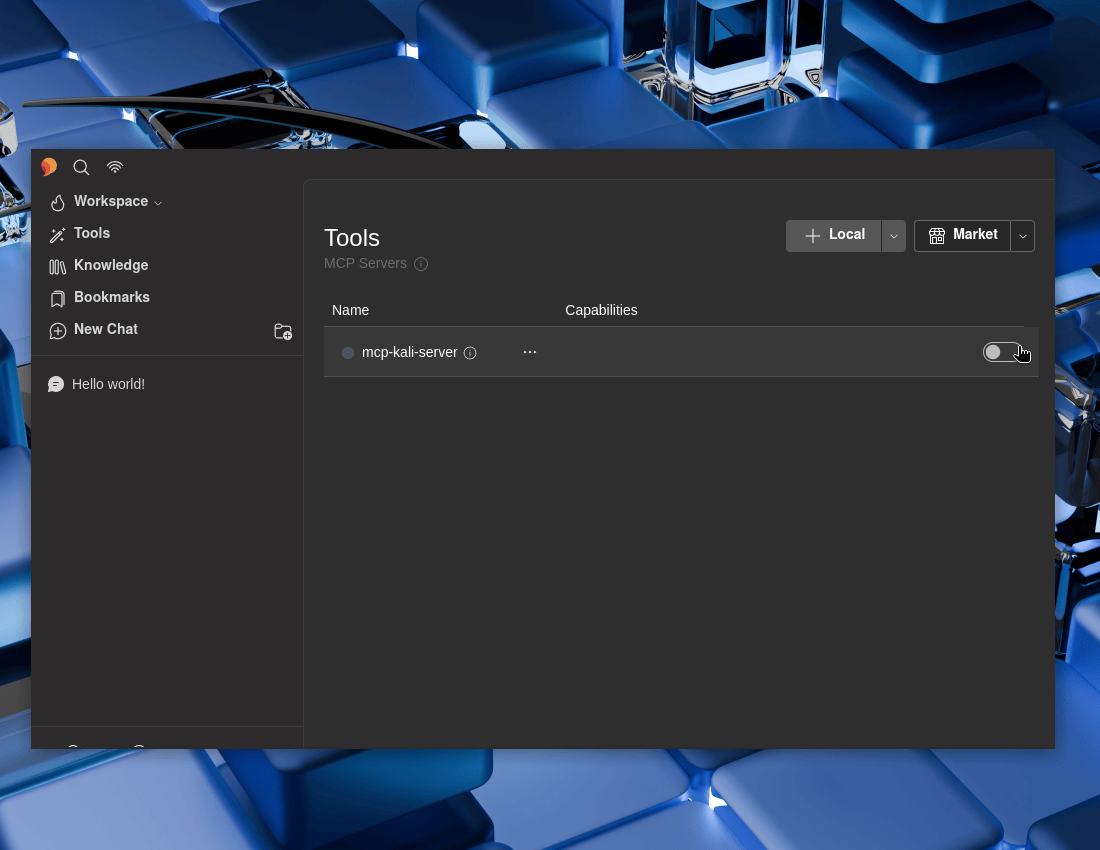
MCP Client (5ire)
We can use 5ire’s GUI :
- 5ire -> Tools -> Local
Now to fill in the boxes:
- Name:
mcp-kali-server - Description:
MCP Kali Server - Approval Policy: …Up to you
- Command:
/usr/bin/mcp-server
Save
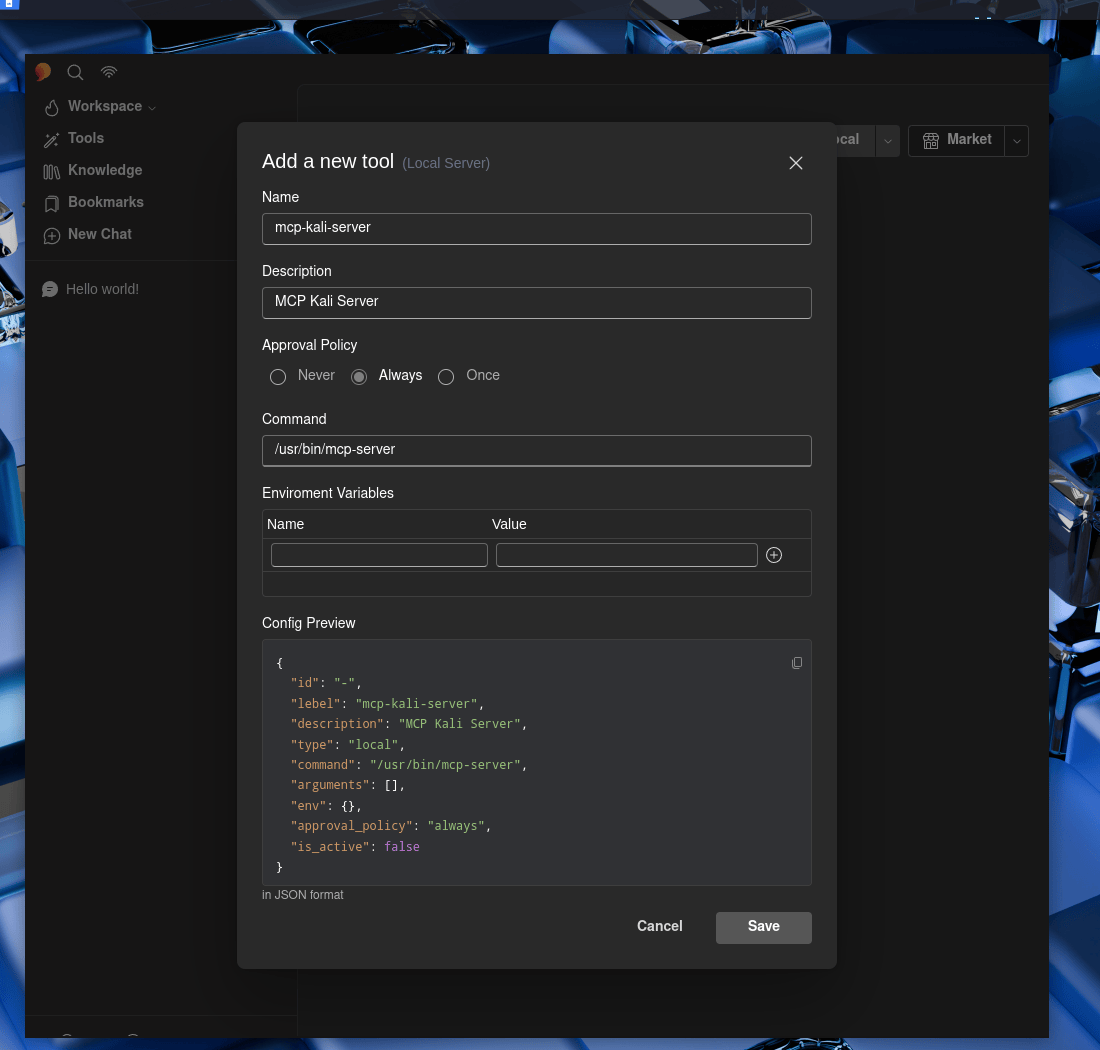
Do not forget to make sure to enable it!
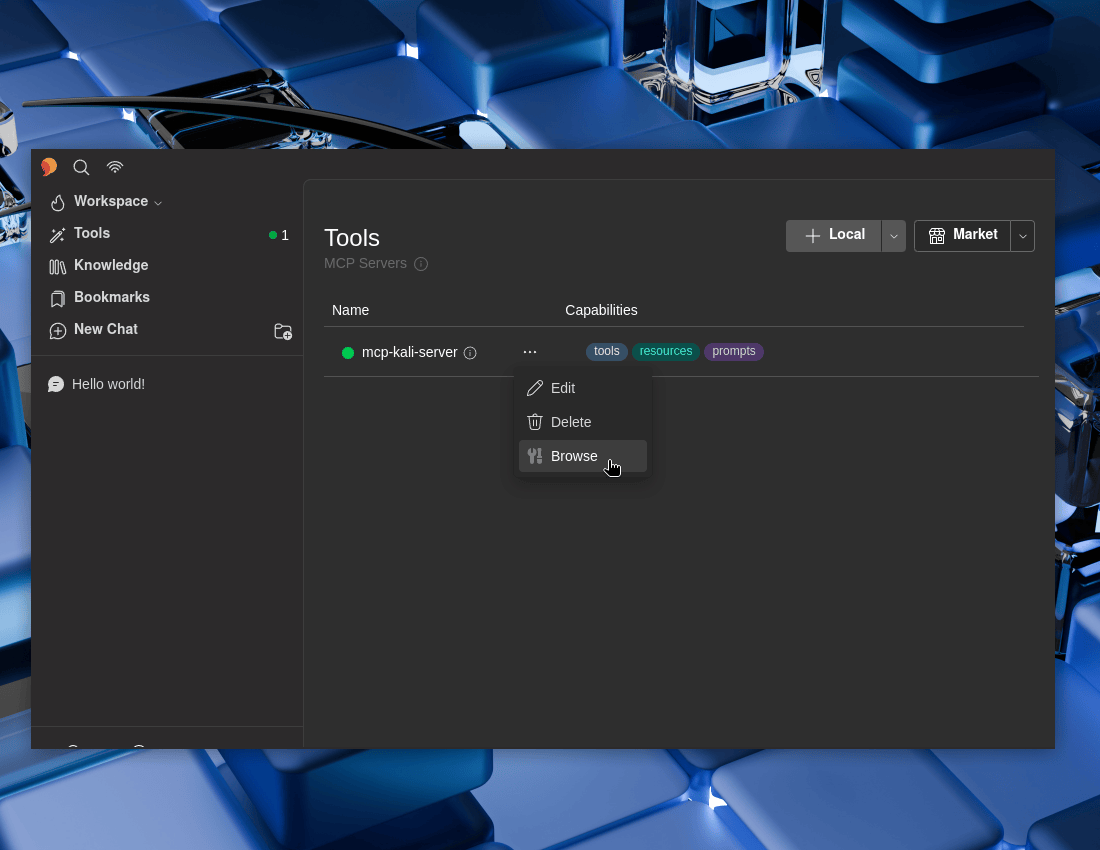
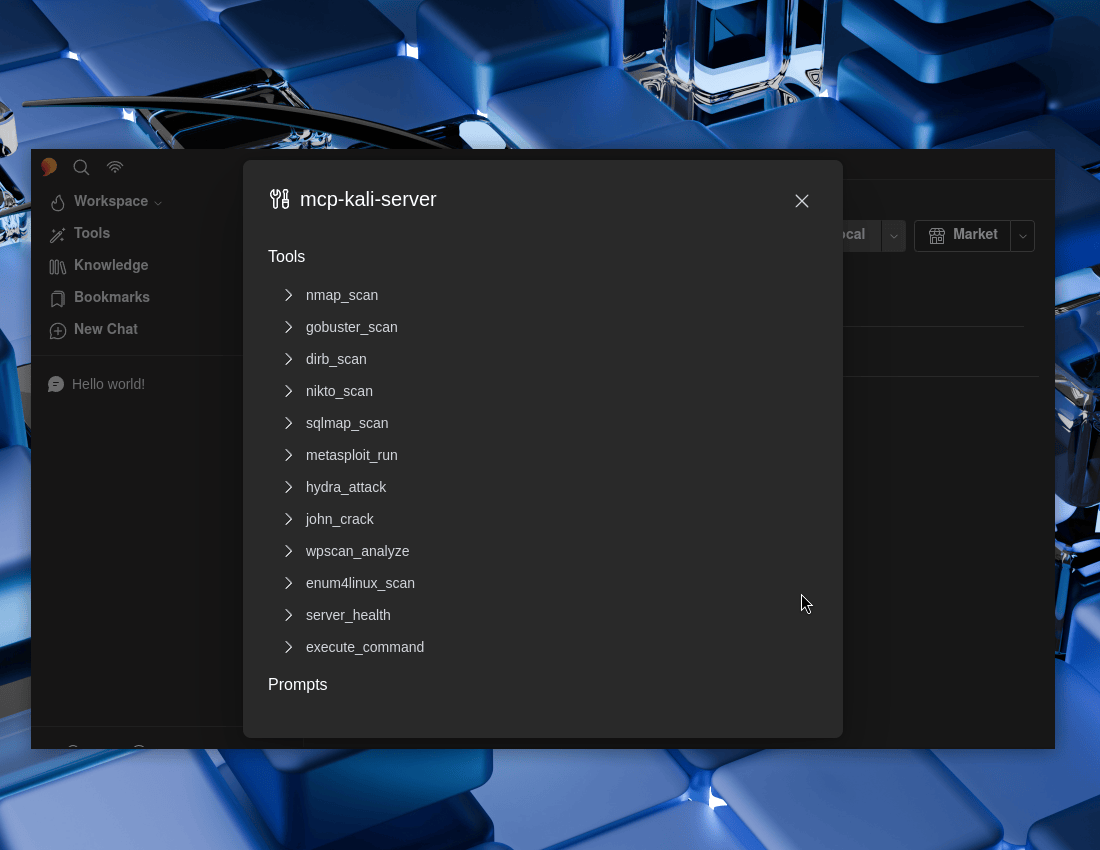
We can see what we now have on offer. ... -> Browse
Testing
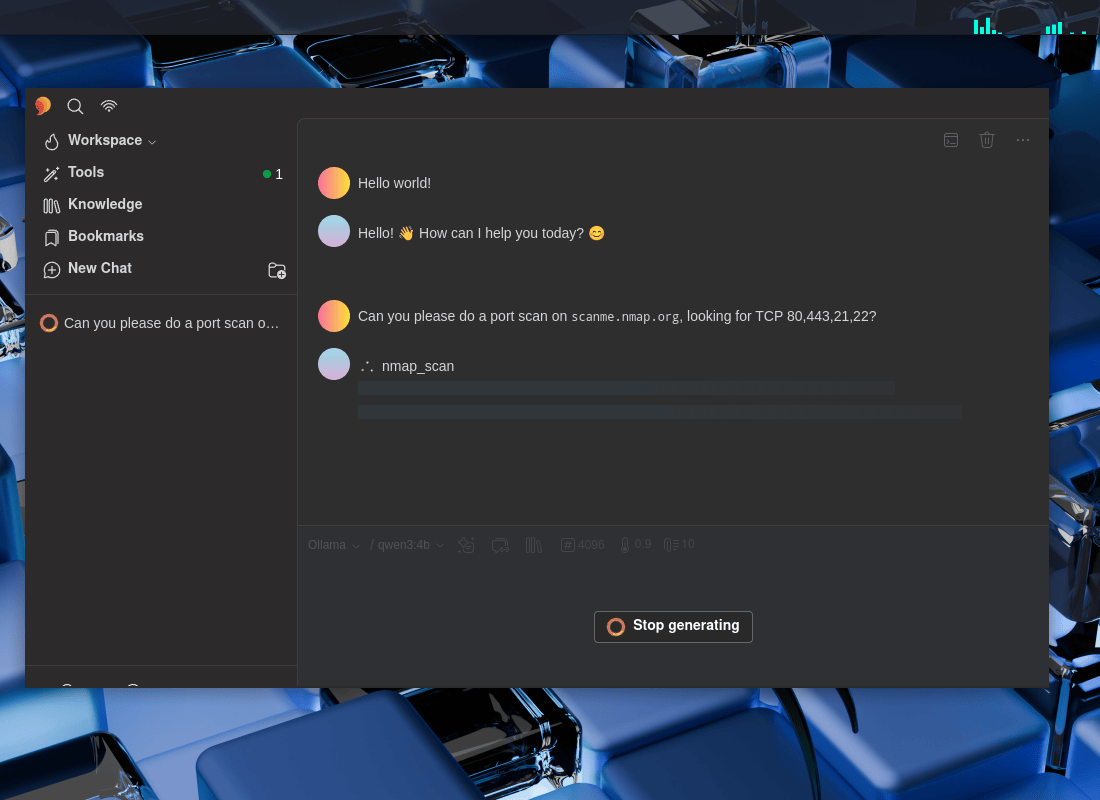
- New Chat -> Ollama
Can you please do a port scan on
scanme.nmap.org, looking for TCP 80,443,21,22?
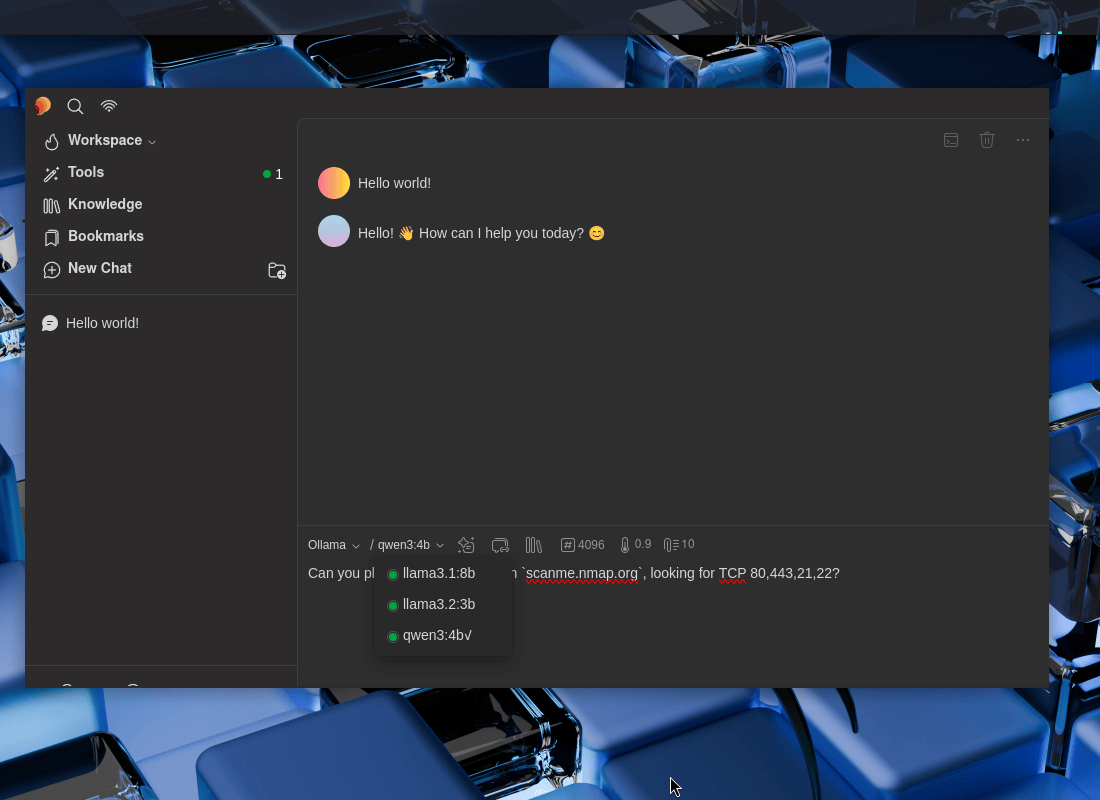

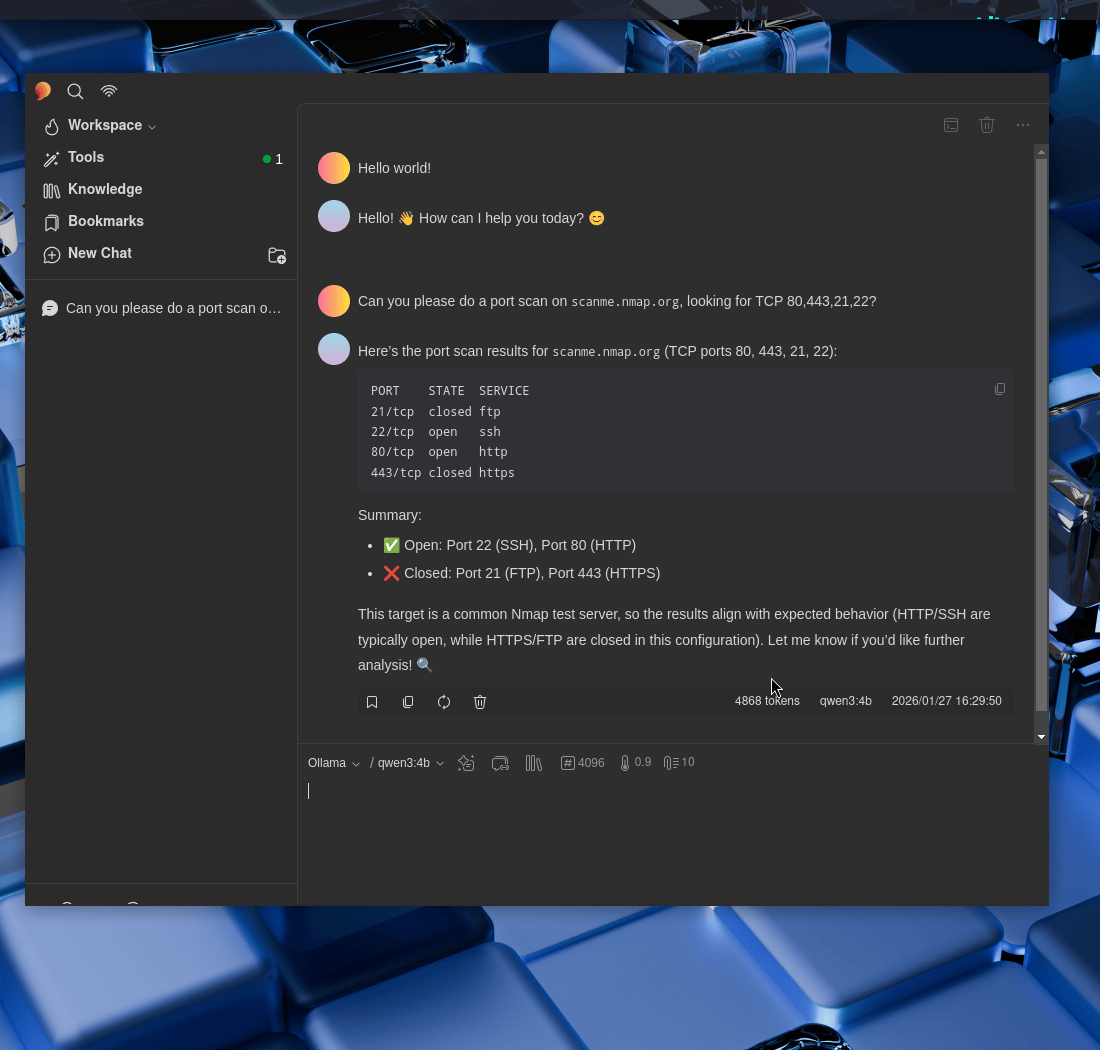
Wonderful!
Recap
As a recap:
- On our Kali local instance, we enabled our GPU for development.
- We setup Ollama and grabbed a few LLMs, such as
qwen3:4b. - Setup a MCP server,
MCP-Kali-Server. - We installed a GUI interface,
5ire. - We setup 5ire to use Ollama’s LLMs as well as MCP client to use mcp-kali-server.
- We then used it all to-do a
nmapport scan ofscanme.nmap.org…all processed locally!
We may be talking about AI, but AI was not used to write this!
Find out more about advanced red teaming for AI environments at OffSec.com.