
OpenVAS 8.0 Vulnerability Scanning
Table of Contents
Vulnerability scanning is a crucial phase of a penetration test and having an updated vulnerability scanner in your security toolkit can often make a real difference by helping you discover overlooked vulnerable items. For this reason, we’ve manually packaged the latest and newly released OpenVAS 8.0 tool and libraries for Kali Linux. Although nothing major has changed in this release in terms of running the vulnerability scanner, we wanted to give a quick overview on how to get it up and running.
Setting up Kali for Vulnerability Scanning
If you haven’t already, make sure your Kali is up-to-date and install the latest OpenVAS. Once done, run the openvas-setup command to setup OpenVAS, download the latest rules, create an admin user, and start up the various services. Depending on your bandwidth and computer resources, this could take a while:
root@kali:~# apt-get update
root@kali:~# apt-get dist-upgrade

root@kali:~# apt-get install openvas
root@kali:~# openvas-setup
/var/lib/openvas/private/CA created
/var/lib/openvas/CA created

[i] This script synchronizes an NVT collection with the 'OpenVAS NVT Feed'.
[i] Online information about this feed: 'https://www.openvas.org/openvas-nvt-feed
...
sent 1143 bytes received 681741238 bytes 1736923.26 bytes/sec
total size is 681654050 speedup is 1.00
[i] Initializing scap database
[i] Updating CPEs
[i] Updating /var/lib/openvas/scap-data/nvdcve-2.0-2002.xml
[i] Updating /var/lib/openvas/scap-data/nvdcve-2.0-2003.xml
...
Write out database with 1 new entries
Data Base Updated
Restarting Greenbone Security Assistant: gsad.
User created with password '6062d074-0a4c-4de1-a26a-5f9f055b7c88'.
Once openvas-setup completes its process, the OpenVAS manager, scanner, and GSAD services should be listening:
root@kali:~# netstat -antp
Active Internet connections (servers and established)
Proto Recv-Q Send-Q Local Address Foreign Address State PID/Program name
tcp 0 0 127.0.0.1:9390 0.0.0.0:* LISTEN 9583/openvasmd
tcp 0 0 127.0.0.1:9391 0.0.0.0:* LISTEN 9570/openvassd: Wai
tcp 0 0 127.0.0.1:9392 0.0.0.0:* LISTEN 9596/gsad
Starting the OpenVAS services
If you have already configured OpenVAS, you can simply start all the necessary services by running openvas-start:
root@kali:~# openvas-start
Starting OpenVas Services
Starting Greenbone Security Assistant: gsad.
Starting OpenVAS Scanner: openvassd.
Starting OpenVAS Manager: openvasmd.
If you need to troubleshoot any issues, you can use openvas-check-setup to identity the problem.
Connecting to the OpenVAS Web Interface
Point your browser to https://127.0.0.1:9392, accept the self signed SSL certificate and plugin the credentials for the admin user. The admin password was generated during the setup phase (look at the output above if you missed it).
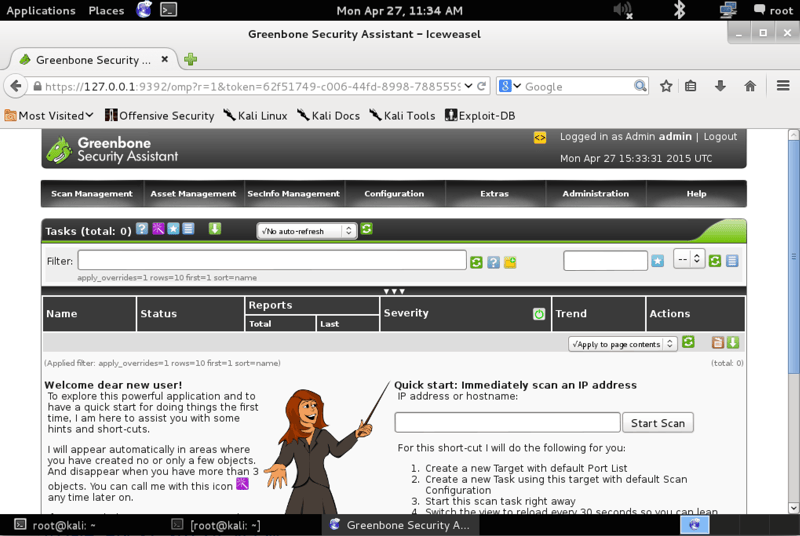
That’s it! Now OpenVAS is ready for you to configure it and run a scan against a given IP or range. Happy vulnerability scanning!