Kali inside VirtualBox (Guest VM)
Table of Contents
This guide is about virtualizing Kali Linux inside of VirtualBox, allowing you to have a Kali VM. This is a great way to use Kali, as it is completely separate from the host, allows you to interact with other VMs (as well as the host machine and other machines on the network), and allows you to revert to snapshots.
You may wish to follow our other guide if you are trying to install VirtualBox on Kali Linux (as a host).
The guide below is what we use to generate our pre-made Kali Linux VirtualBox images. You may alter this to your needs. We always generate the images using the latest version of VirtualBox.
You may need to enable virtualization in your BIOS/UEFI for (e.g. Intel VT-x/AMD-V)
Wizard
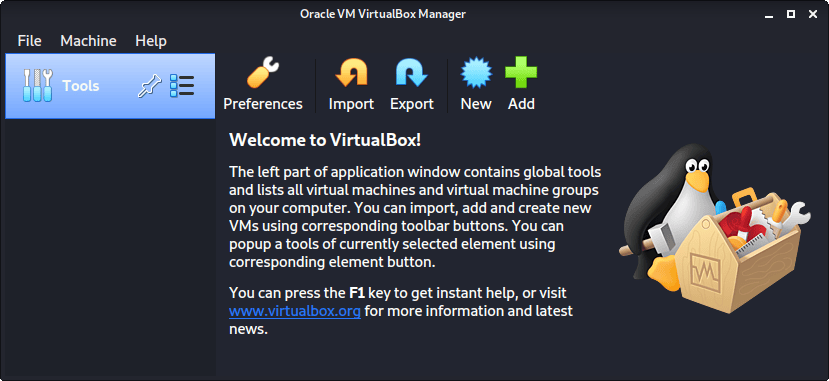
Upon starting up VirtualBox, select “New” (Machine -> New).
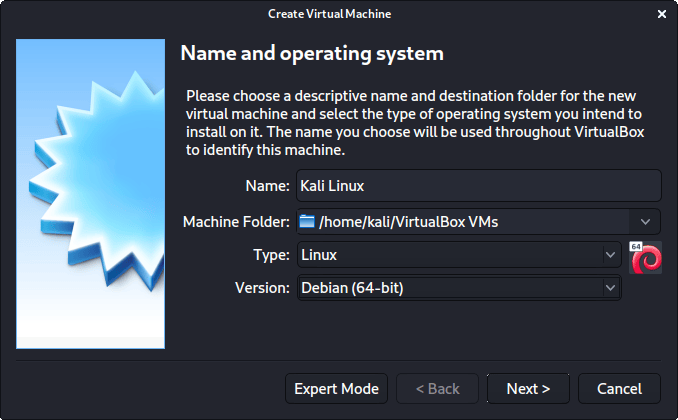
The next screen is “Name and operating system” which is where you name the VM. This name is also used in any filenames (such as the configuration, hard disk and snapshot - which isn’t changed from this point).
We are keeping it generic in this guide (as Kali is a rolling distribution, and we update it), however for our releases, we use the version number in the name as it is a fixed release (kali-linux-YYYY.N-vbox-ARCH. Example: kali-linux-2026.1-vbox-amd64).
For the “Type”, we set it as Linux. For the “Version”, we are going to be using the x64 desktop image, so we are going to select Debian (64-bit).
“Memory size” is the next section, where we can define how much RAM to use. Again, the higher the amount of RAM, the more applications can be open and at increased performance. Various tools inside of Kali can be demanding of resources. When we make the general VMs, we select 2048 MB (2GB) for RAM, but we often increase this for our personal machines as we have high-performing devices with spare RAM which Kali can utilize.

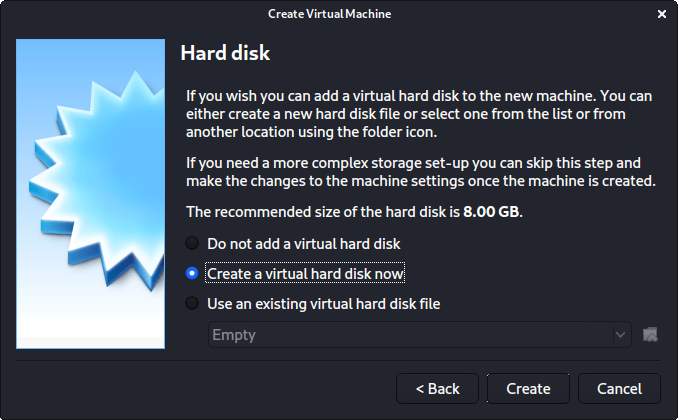
This screen below, “Hard disk”, allows us to Create a new virtual disk now.
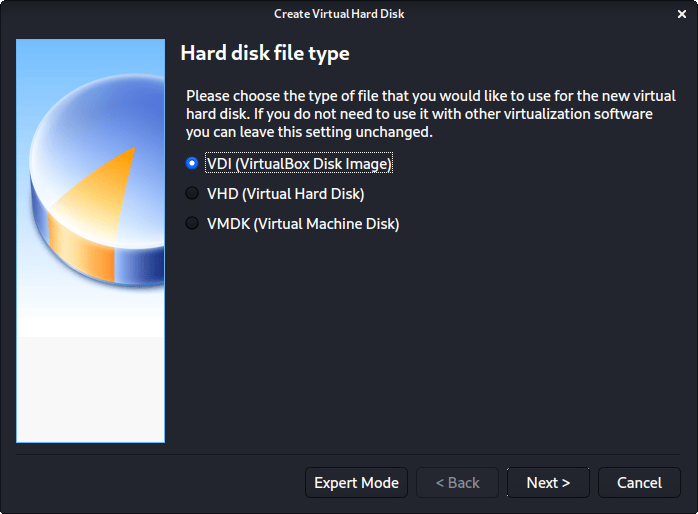
For the “Hard disk file type”, we select VDI (VirtualBox Disk Image) (and its the default option).
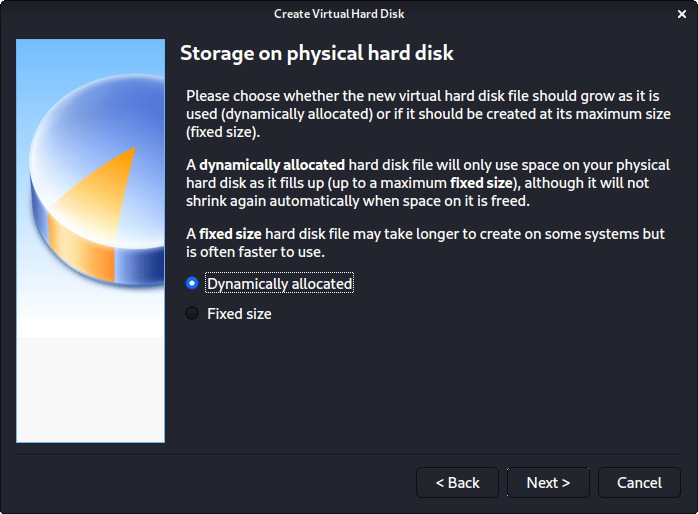
For the following screen, “Storage on physical hard disk”, we go with the default option of Dynamically allocated.
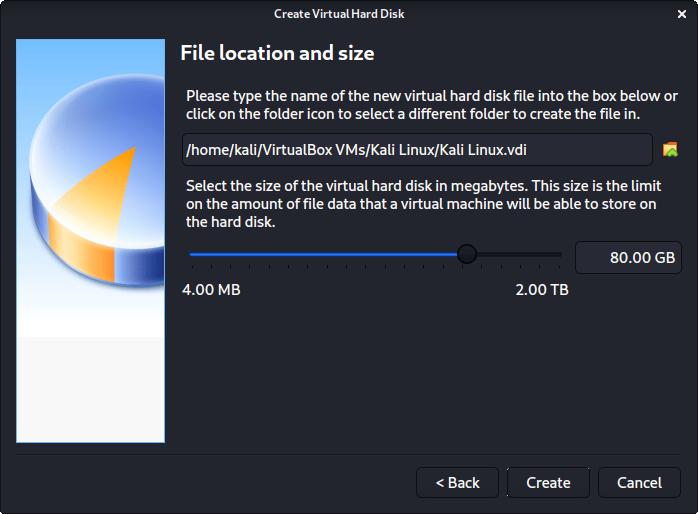
Now with “File location and size”, we can now define how large the virtual hard disk will be. We use 80.00 GB for our VMs.
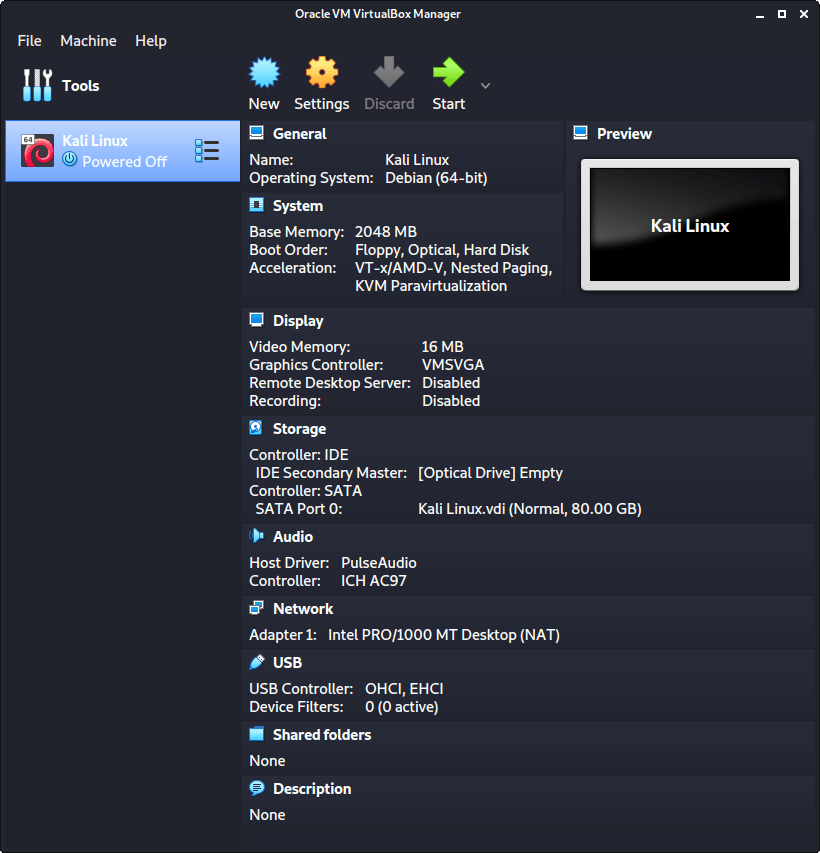
After clicking on “Create”, the wizard is complete.
Now we click on “Settings”, to customize the VM further.
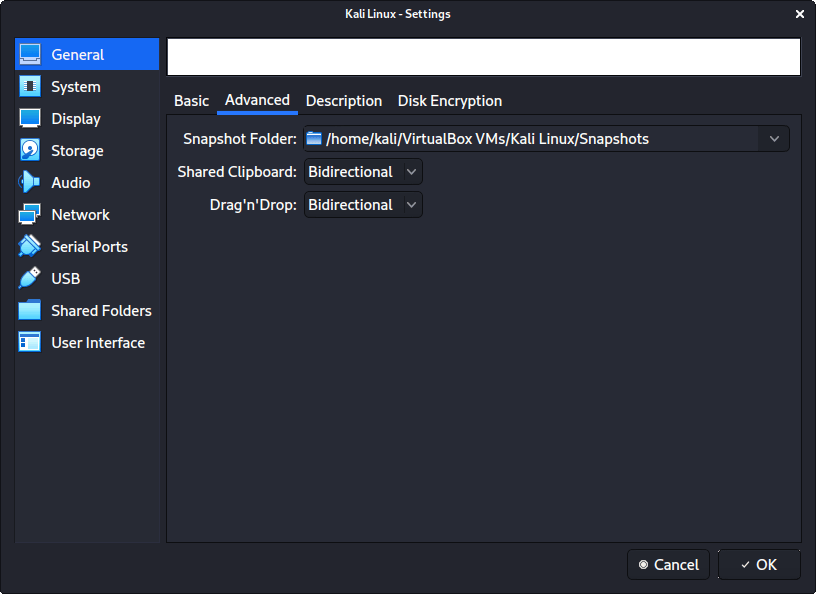
In “General” -> “Advanced”, we make sure to set “Shared Clipboard” to bidirectional, as well as “Drag’n’Drop” to bidirectional
In “System” -> “Motherboard”, we change the “Boot Order” to make sure Hard Disk is top and Optical is the second. Everything else is disabled.
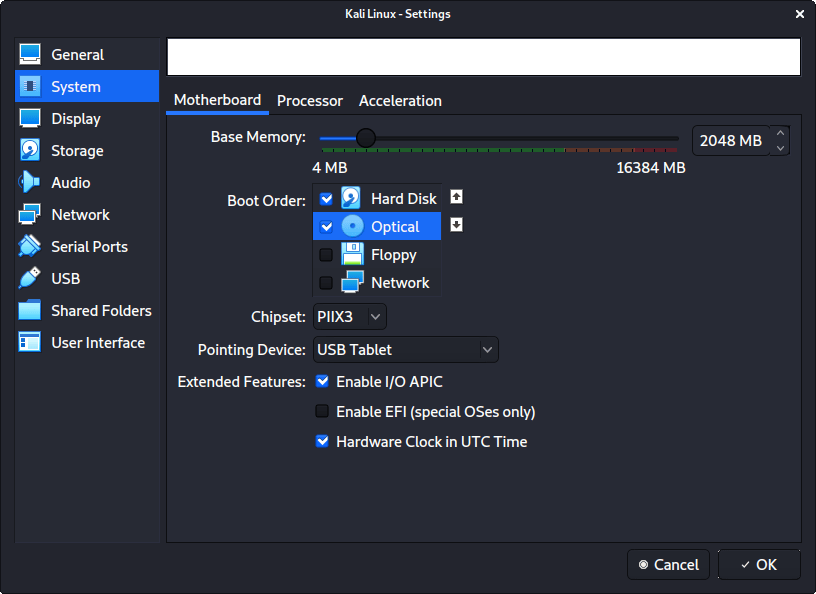
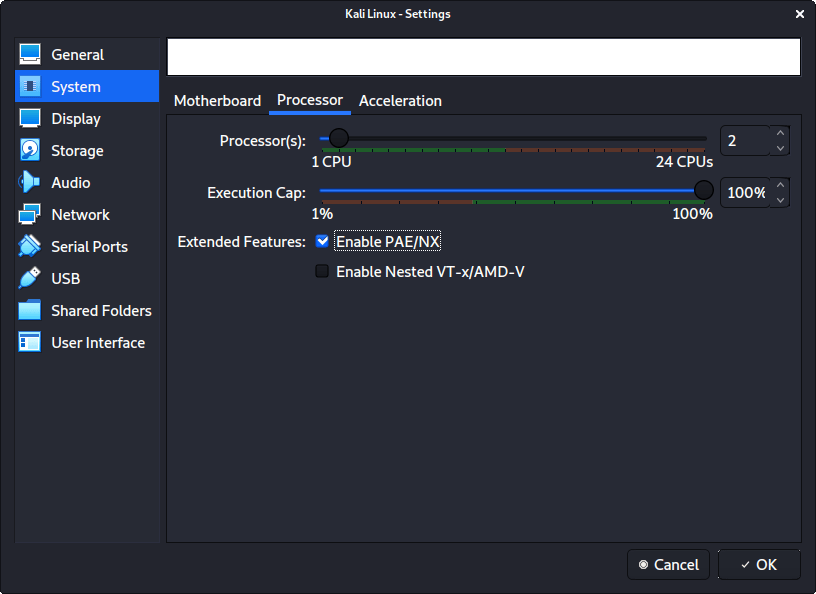
In “System” -> “Processor”, we increase the “Processor(s)” to be 2.
At the same time, we also enable “Extended Features” for Enable PAE/NX.
In “Display” -> “Screen”, we make sure to have “Video Memory” set to 128 MB
Another item to point out is to make sure that “Accelerated 3D graphics” is disabled, as people have reported that causes issues.
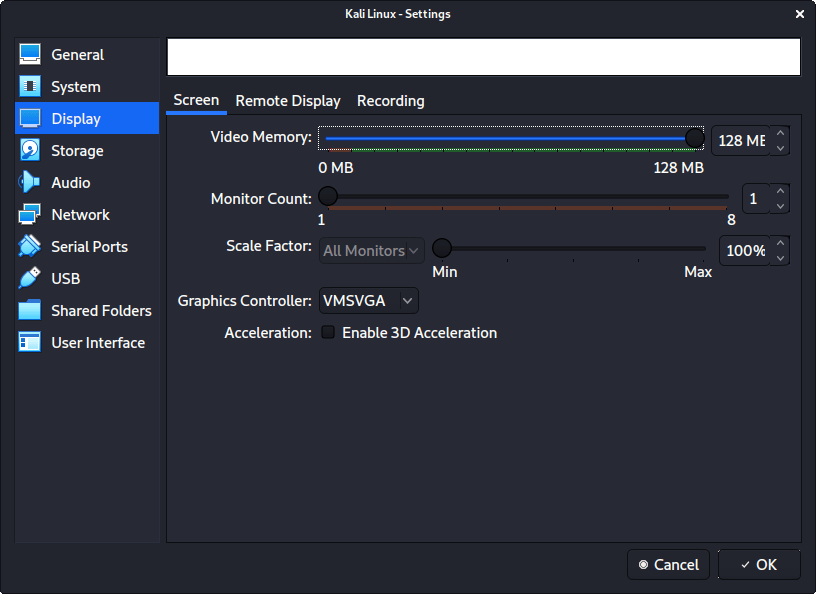
The final settings view looks like the following:
When we are ready to go, press “Start”.
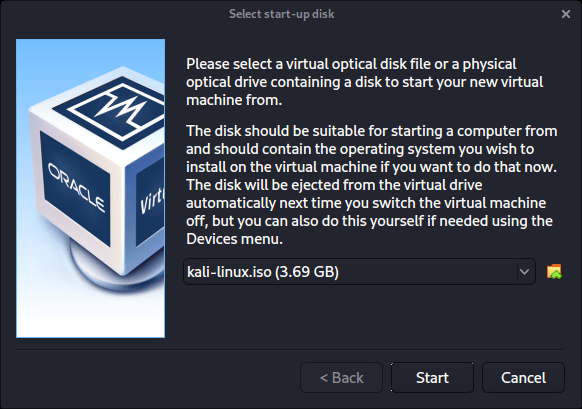
The first time we run it, we will get a prompt saying do we wish to mount an image to use as a “start-up disk”. We want to use our Kali image, rather than a physical drive, so we select the icon to the side of the drop down.
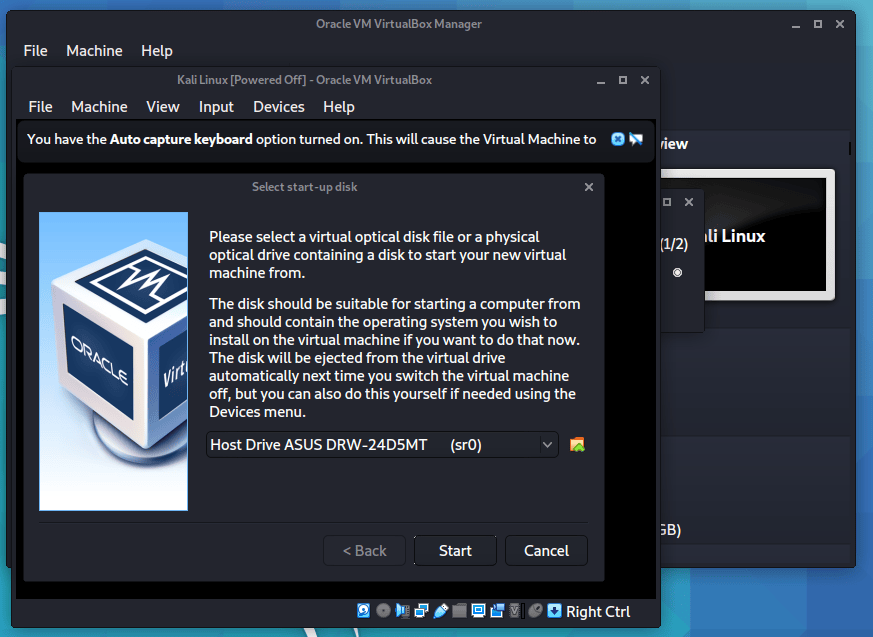
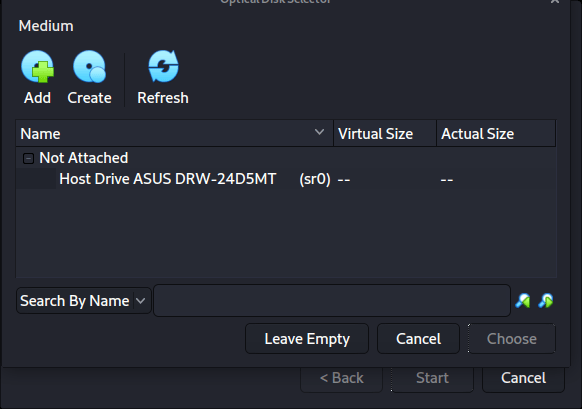
A new pop up will open, “Optical Disk Selector”. We will now press “Add”, then navigate to where our ISO is located.
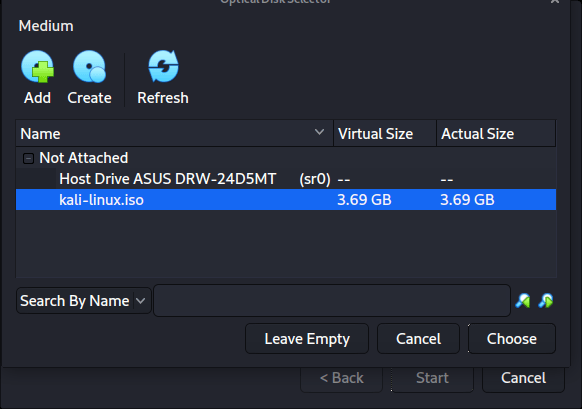
After pressing “Open”, we can see its been added, so we make sure its selected and press “Choose”.
All that is left now to do is press “Start”.
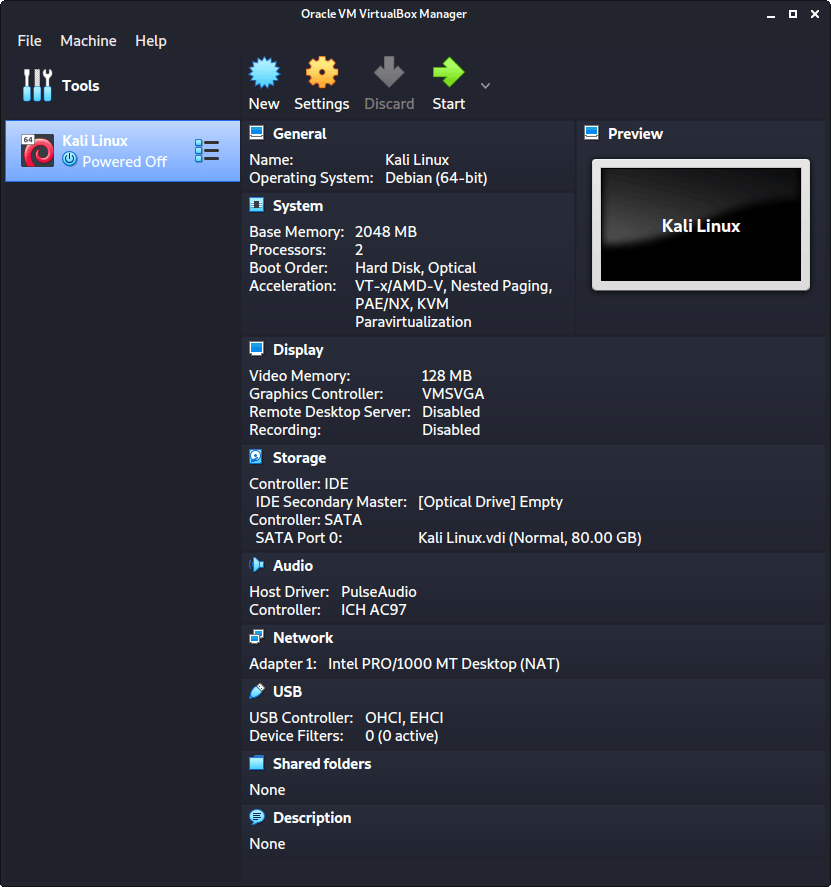
After all this is done, we save, start up the VM, and then continue installing Kali Linux as we normally would for a bare metal install.
During Kali Linux setup process, the install wizard should detect if its inside a VM. If it is, should then automatically install any additional tools (such as virtualbox-guest-x11) to give a better user experience. If you want to manually re-install it, you can see our VirtualBox Guest Guide.
Expanding Storage
Oracle VirtualBox 7.0:
Make sure that your Kali Linux virtual machine is powered off.

Now after selecting your Virtual Machine from the Virtual Box menu, click on File -> Tools -> Virtual Media Manager

Now click on the vdi file that contain your virtual machine. Now you can adjust the size of the virtual machine. After adjusting the size, click on ‘Apply’.

Boot up Kali Linux and utilize gparted or a comparable tool to extend the partition and filesystem, ensuring the new space is allocated correctly.
Updated on: 2026-Mar-28
Authors:
g0tmi1k
,
serval123