VMware Fusion Kali USB Boot
VMware Fusion Kali USB Boot
One of the fun, and often necessary, features of Kali Linux is the ability to create really killer, completely customized live-boot installations. Normally stored on a USB drive, these installations put the power of Kali Linux in your pocket, ready to launch whenever you need it.
Building Kali live USB installations is pretty straightforward, whether you’re going for plain installation, building in persistence so you can store files, going fully-encrypted (even arming a self-destruct passphrase), or customizing and building your own tailored install.
However, the process of testing your USB install can be a bit of a pain, especially if you’re a Mac user. You could, under certain circumstances, reboot your Mac and boot from the USB, but that can be a real hassle.
However, wouldn’t it be great if you could use a product like VMware Fusion (which is the industry-leading product and does a fabulous job running every other OS on our Macs already) to boot and test your live USBs? No rebooting. No fuss. Just pop it in and let it fly.
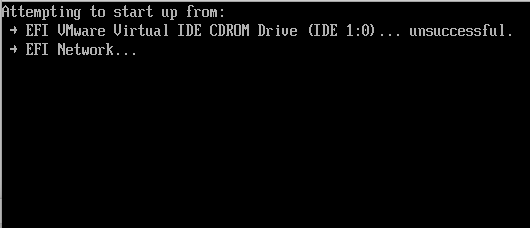
That seemed like a great idea but the Fusion product has been in flux for awhile, and seems to get “special” treatment from VMware. The company seems to think that Mac users don’t need extensive options, like a checkbox for EFI booting. Instead, they set it up so that if your guest is Mac or Windows-based, it will automatically do an EFI boot for you. That’s helpful, but if you create a Mac or Windows guest and try to boot from the USB, you’ll get the Kali boot screen, followed by a boot-halting message that the USB doesn’t contain a version of Mac or Windows.
Because of this flux, and core differences between Fusion and the rest of the VMware line, this EFI USB booting issue had us stumped. A few workarounds have been introduced, like booting a specialized VM that would attempt an EFI boot, but they had their own problems.
Thankfully, Fusion has matured enough that now we can get under the hood and make this process work. Here’s how you do it.
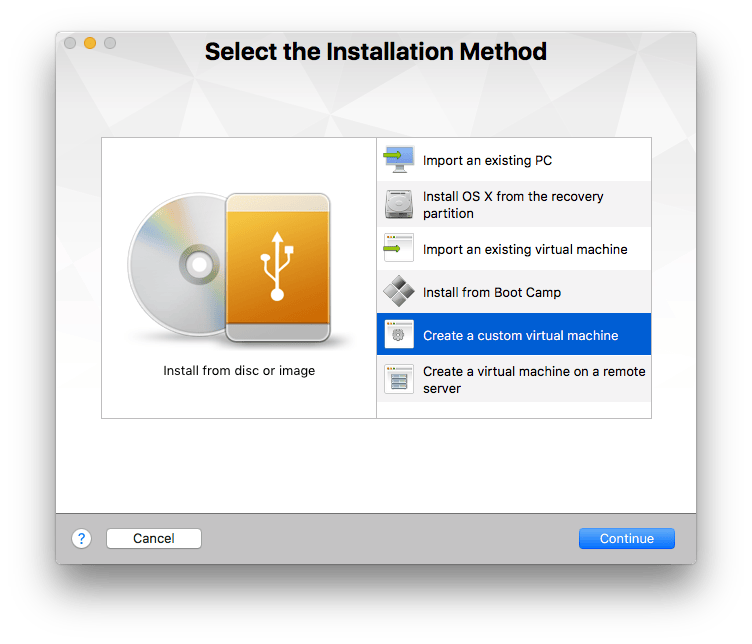
Create a new custom VM:
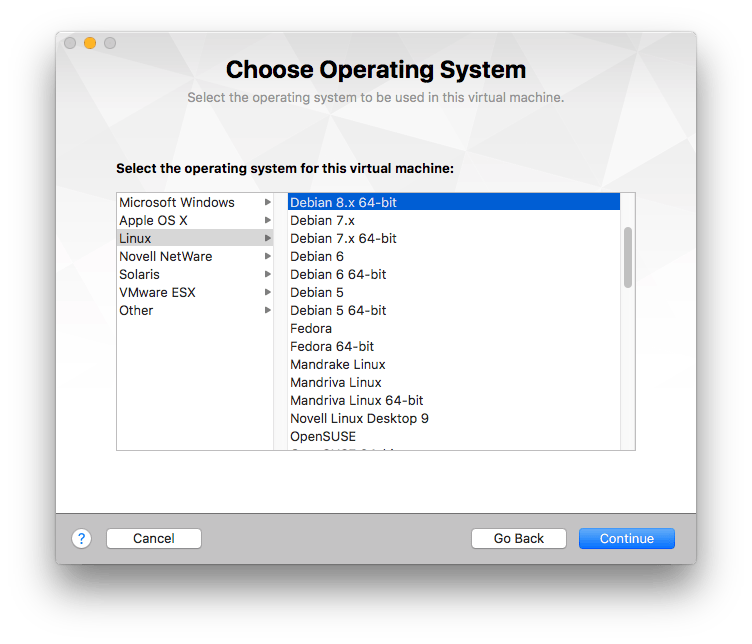
Select “Linux” -> “Debian 8.x 64-bit”.
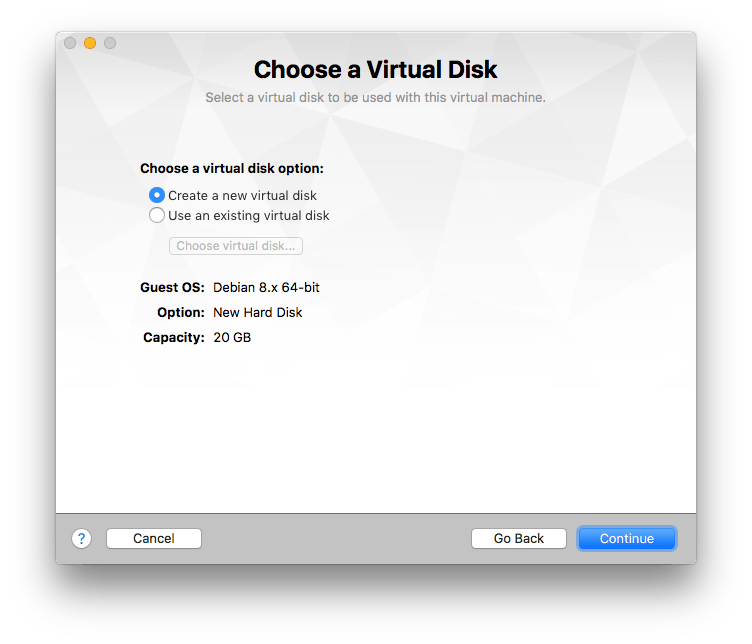
Create a new virtual disk. Settings do not matter.
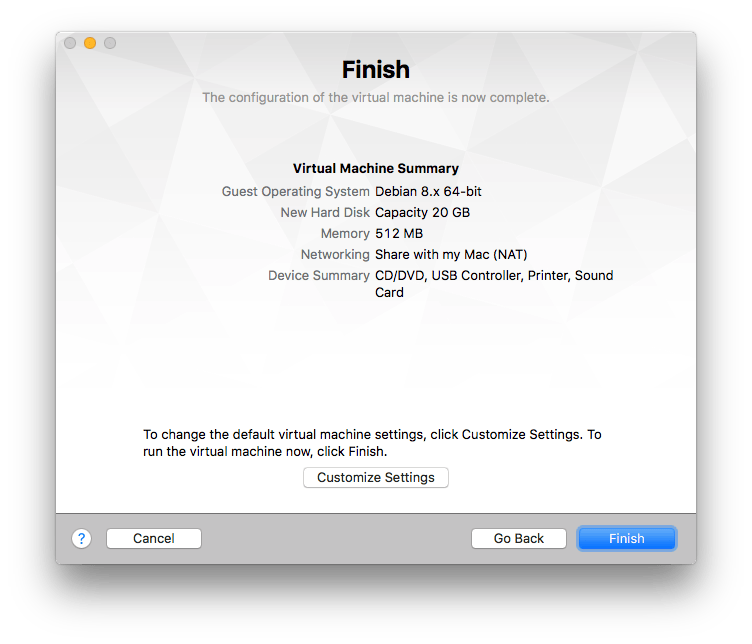
Click “Finish”:
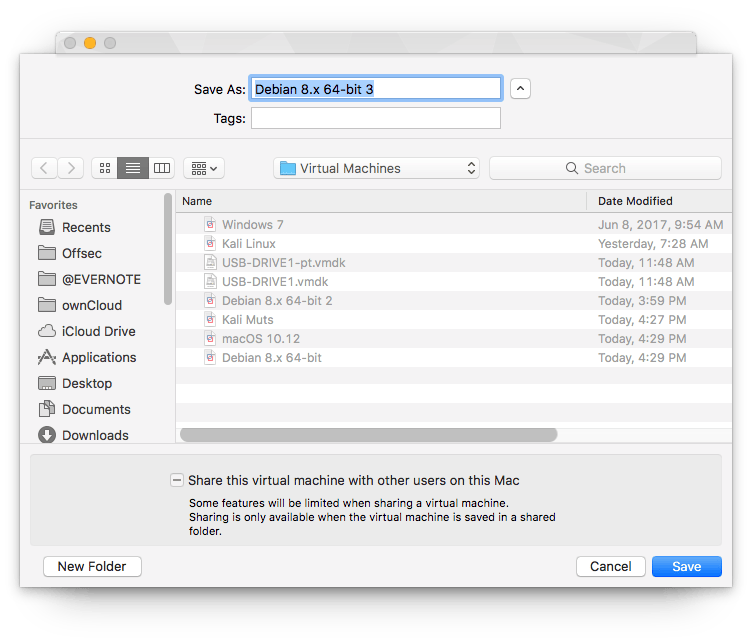
Give it a snappy name:
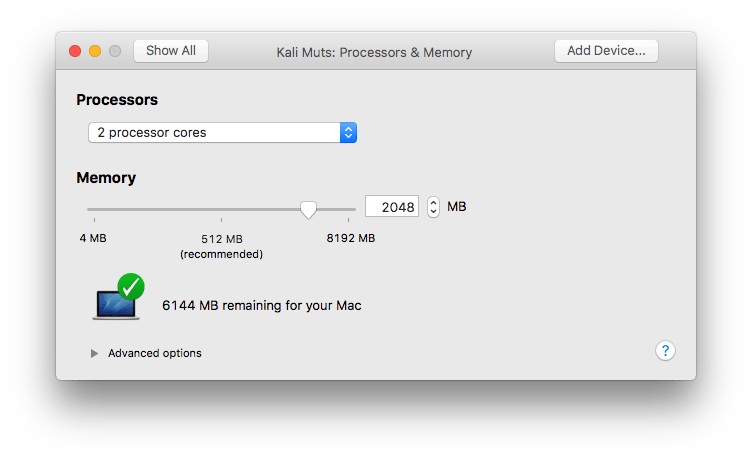
Shut down the machine. Go to “Virtual Machine” -> “Settings” -> “Processor and Memory”, set memory to at least 2048 MB, and set cores to “2”:
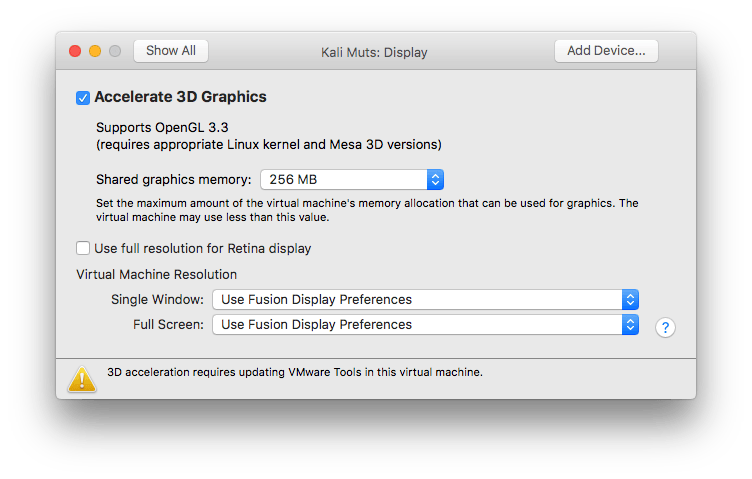
Next, head to “Settings” -> “Display”, and check “Accelerate 3D Graphics”. This is optional, but it really helps the performance of your Kali experience. “Use full resolution..” is also optional.
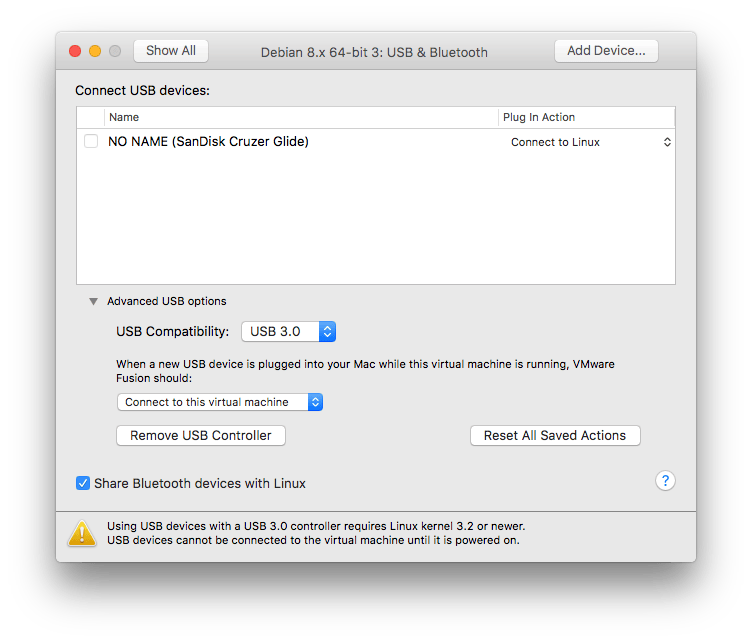
Head to “USB Devices”. Insert your Kali USB and set USB compatibility to USB 3.0 (if you have a USB 3.0 compatible system and drive). Note that USB-C, dongles or not, make no difference here. Just make sure that if you’re using a USB-C device, select USB 3.0 compatibility. Select “Connect to Linux” as the “Plug in Action” and set the machine to “Connect to this virtual machine” when it is plugged in:
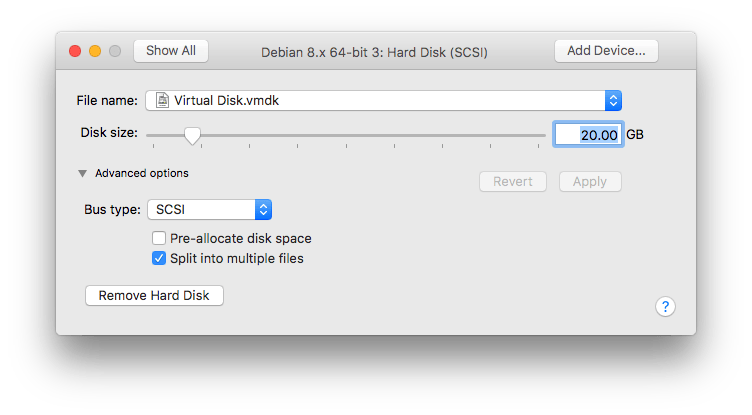
Go to “Settings” -> “Disks”. Select “Advanced Options” and “Remove Hard Disk”, sending it to the Trash. You won’t need it.
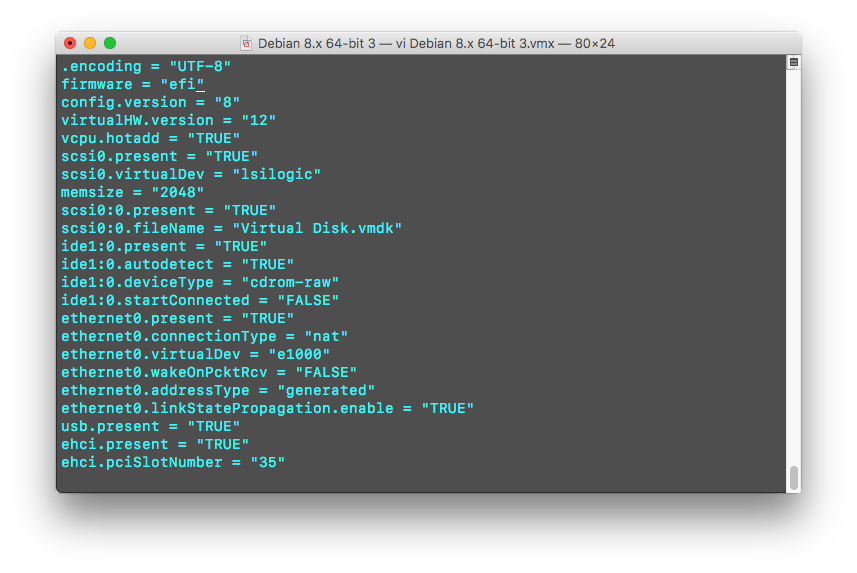
Next, you’ll need to enable EFi booting. There is no GUI setting for this so, you need to find this VM on your hard drive. Virtual hard drives are stored by default in ~/Documents//Virtual Machines.localized. Change to the directory containing this VM. Ours is called “Kali USB Boot” so the full path is ~/Documents//Virtual Machines.localized/Kali USB Boot.vmwarevm". Within that directory is a .vmx file named after the VM. Ours is called Kali USB Boot.vmx. Edit that file with your favourite editor and insert the following line:
firmware = "efi"
Be careful with copy and paste. If you paste this line into the editor, you may get funny “Mac quotes” and this will break the VM. Your .vmx file should look something like this:
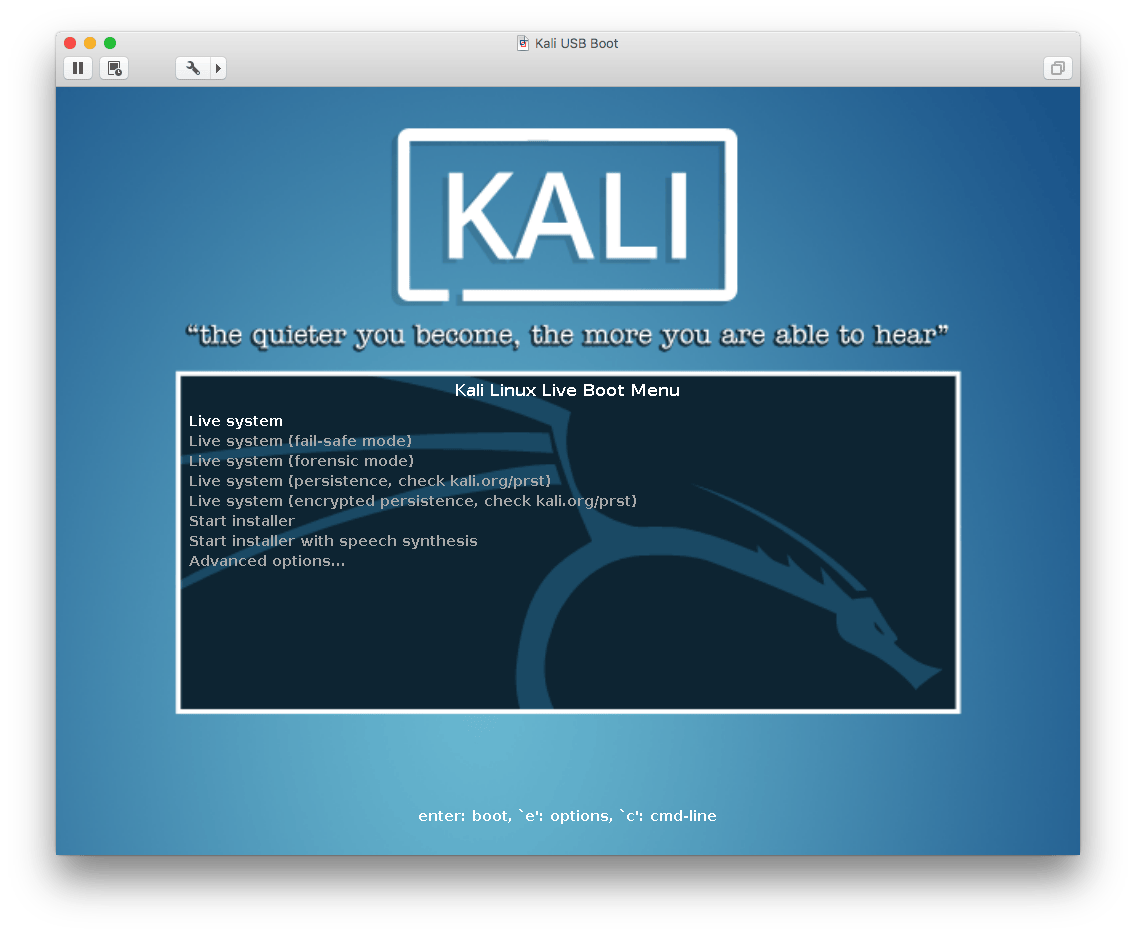
Now, power on your VM, and it should boot to Kali Linux:
Troubleshooting USB Connections
If you run into problems, you have a few options. First, power off your VM. Go to “Settings” -> “USB Devices” and leave this settings screen up next to your powered-off VM. (You can also expand your toolbar and look at the USB icon). Now, power on the VM. Immediately, you should see the USB Settings screen update with a check next to your USB device:
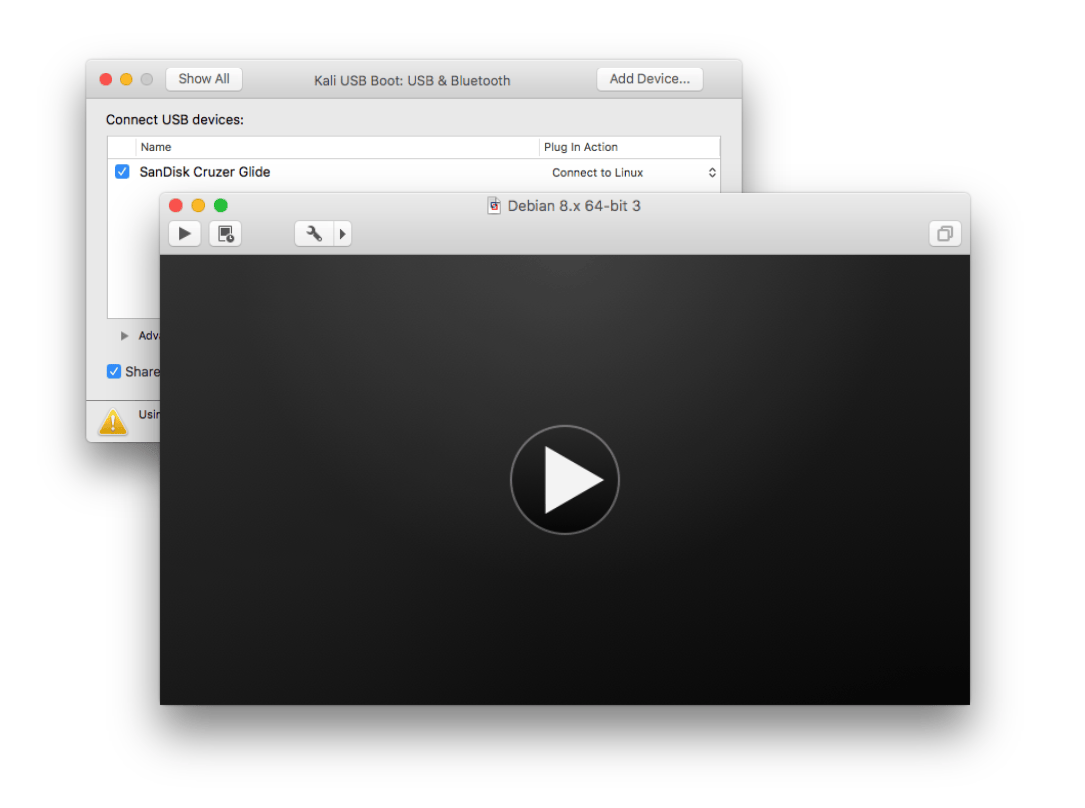
If you don’t get a check mark, this means that your Mac has grabbed the USB drive. Power off your VM, eject the drive from the Mac, and power on the VM again with the USB settings screen up. You should see the check mark and get the Kali boot screen.
Troubleshooting EFI
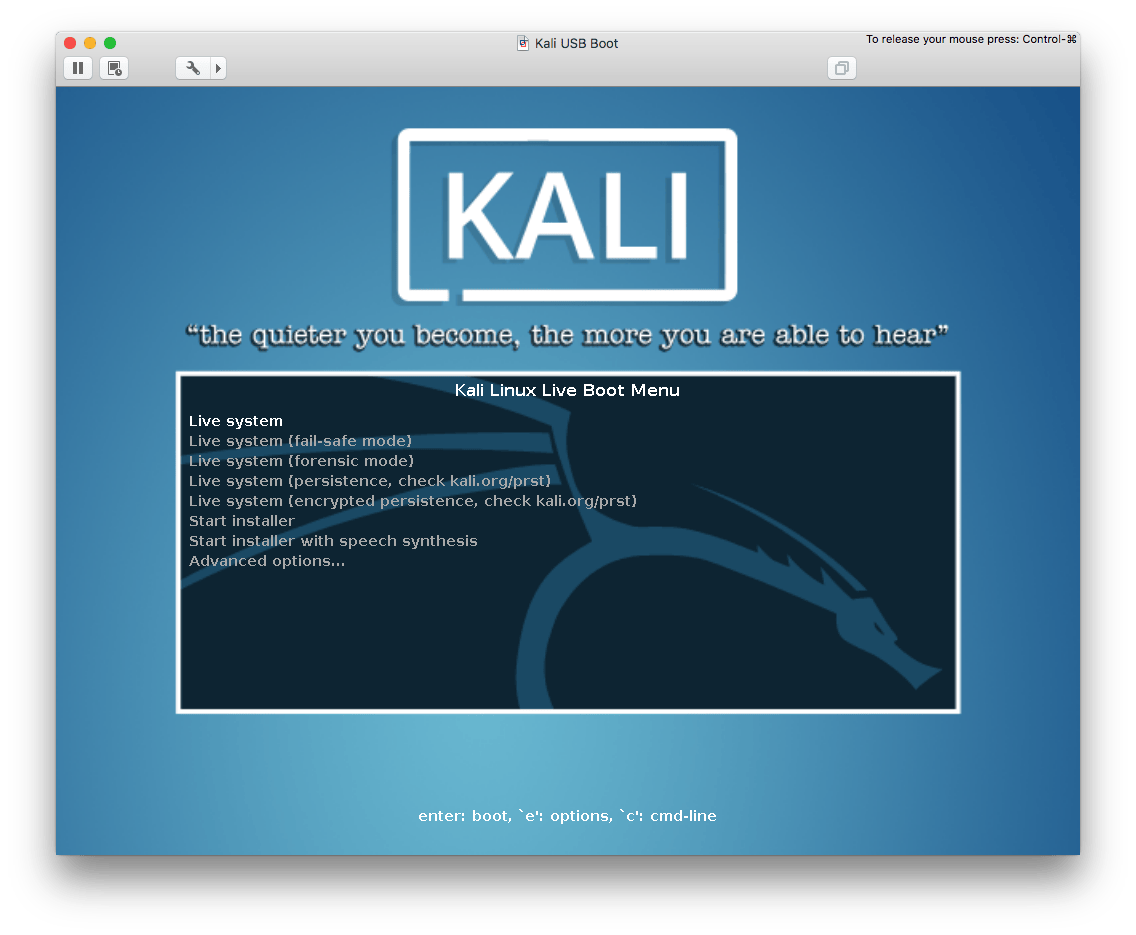
When booting with EFI, your boot screen should look like this:
This indicates that EFI is enabled. If it’s not, triple-check that you entered the firmware line correctly in the .vmx file. Note that in some cases, this EFI Network check may hang. Simply pressing ESC within the VM nudges the process along.
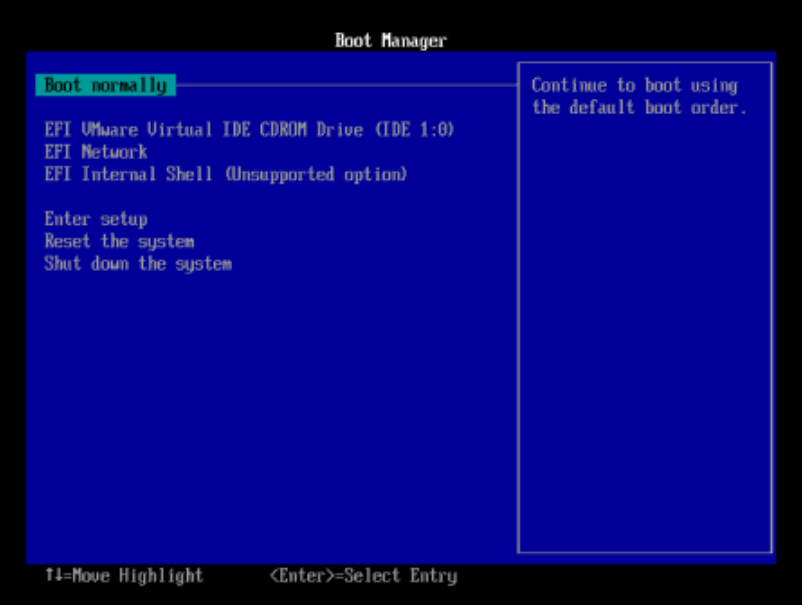
On a normal boot, you can click inside the VM screen and press ESC quickly just as the VMware logo is appearing on the screen to get to the Boot Manager:
From here, you can select “EFI Internal Shell” to get into the shell. If you get something like this, missing an fs0 map, then EFI doesn’t see your USB drive. If this is the case, power off the virtual machine, unplug the USB, start the VM, and immediately after pressing start, insert the drive, looking for the checkmark in settings.
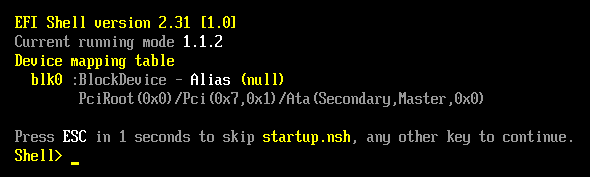
If everything goes well, you’re booted into Kali. Otherwise, you can get to an EFI shell with ESC, “EFI Internal Shell”. A “happy” EFI shell looks like this:

Note the fs0 map. Next, you can enter ‘fs0:’ and ’ls’ to look around.
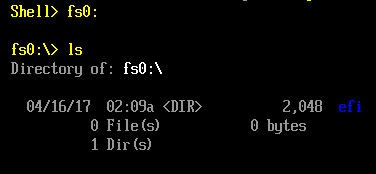
You can enter ‘cd efi\boot’ (notice the backslash, not a forward slash!) and boot the device manually with ‘bootx64.efi’
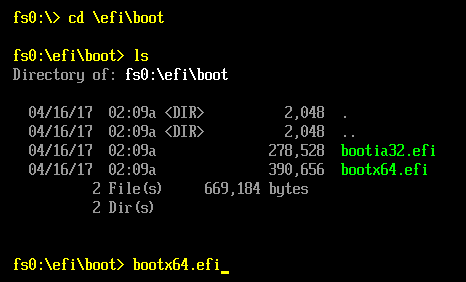
This should give you a happy EFI boot:
Note that on some installations, the shutdown, followed by removing the drive, powering on the VM and inserting the drive might be required. This likely has much to do with the Mac grabbing the USB drive, or half-grabbing it (without mounting).